Installation
Download and extract to your repository:
.github/skills/markdown-to-html/ Extract the ZIP to .github/skills/ in your repo. The folder name must match markdown-to-html for Copilot to auto-discover it.
Skill Files (16)
SKILL.md 24.0 KB
---
name: markdown-to-html
description: 'Convert Markdown files to HTML similar to `marked.js`, `pandoc`, `gomarkdown/markdown`, or similar tools; or writing custom script to convert markdown to html and/or working on web template systems like `jekyll/jekyll`, `gohugoio/hugo`, or similar web templating systems that utilize markdown documents, converting them to html. Use when asked to "convert markdown to html", "transform md to html", "render markdown", "generate html from markdown", or when working with .md files and/or web a templating system that converts markdown to HTML output. Supports CLI and Node.js workflows with GFM, CommonMark, and standard Markdown flavors.'
---
# Markdown to HTML Conversion
Expert skill for converting Markdown documents to HTML using the marked.js library, or writing data conversion scripts; in this case scripts similar to [markedJS/marked](https://github.com/markedjs/marked) repository. For custom scripts knowledge is not confined to `marked.js`, but data conversion methods are utilized from tools like [pandoc](https://github.com/jgm/pandoc) and [gomarkdown/markdown](https://github.com/gomarkdown/markdown) for data conversion; [jekyll/jekyll](https://github.com/jekyll/jekyll) and [gohugoio/hugo](https://github.com/gohugoio/hugo) for templating systems.
The conversion script or tool should handle single files, batch conversions, and advanced configurations.
## When to Use This Skill
- User asks to "convert markdown to html" or "transform md files"
- User wants to "render markdown" as HTML output
- User needs to generate HTML documentation from .md files
- User is building static sites from Markdown content
- User is building template system that converts markdown to html
- User is working on a tool, widget, or custom template for an existing templating system
- User wants to preview Markdown as rendered HTML
## Converting Markdown to HTML
### Essential Basic Conversions
For more see [basic-markdown-to-html.md](references/basic-markdown-to-html.md)
```text
```markdown
# Level 1
## Level 2
One sentence with a [link](https://example.com), and a HTML snippet like `<p>paragraph tag</p>`.
- `ul` list item 1
- `ul` list item 2
1. `ol` list item 1
2. `ol` list item 1
| Table Item | Description |
| One | One is the spelling of the number `1`. |
| Two | Two is the spelling of the number `2`. |
```js
var one = 1;
var two = 2;
function simpleMath(x, y) {
return x + y;
}
console.log(simpleMath(one, two));
```
```
```html
<h1>Level 1</h1>
<h2>Level 2</h2>
<p>One sentence with a <a href="https://example.com">link</a>, and a HTML snippet like <code><p>paragraph tag</p></code>.</p>
<ul>
<li>`ul` list item 1</li>
<li>`ul` list item 2</li>
</ul>
<ol>
<li>`ol` list item 1</li>
<li>`ol` list item 2</li>
</ol>
<table>
<thead>
<tr>
<th>Table Item</th>
<th>Description</th>
</tr>
</thead>
<tbody>
<tr>
<td>One</td>
<td>One is the spelling of the number `1`.</td>
</tr>
<tr>
<td>Two</td>
<td>Two is the spelling of the number `2`.</td>
</tr>
</tbody>
</table>
<pre>
<code>var one = 1;
var two = 2;
function simpleMath(x, y) {
return x + y;
}
console.log(simpleMath(one, two));</code>
</pre>
```
```
### Code Block Conversions
For more see [code-blocks-to-html.md](references/code-blocks-to-html.md)
```text
```markdown
your code here
```
```html
<pre><code class="language-md">
your code here
</code></pre>
```
```js
console.log("Hello world");
```
```html
<pre><code class="language-js">
console.log("Hello world");
</code></pre>
```
```markdown
```
```
visible backticks
```
```
```
```html
<pre><code>
```
visible backticks
```
</code></pre>
```
```
### Collapsed Section Conversions
For more see [collapsed-sections-to-html.md](references/collapsed-sections-to-html.md)
```text
```markdown
<details>
<summary>More info</summary>
### Header inside
- Lists
- **Formatting**
- Code blocks
```js
console.log("Hello");
```
</details>
```
```html
<details>
<summary>More info</summary>
<h3>Header inside</h3>
<ul>
<li>Lists</li>
<li><strong>Formatting</strong></li>
<li>Code blocks</li>
</ul>
<pre>
<code class="language-js">console.log("Hello");</code>
</pre>
</details>
```
```
### Mathematical Expression Conversions
For more see [writing-mathematical-expressions-to-html.md](references/writing-mathematical-expressions-to-html.md)
```text
```markdown
This sentence uses `$` delimiters to show math inline: $\sqrt{3x-1}+(1+x)^2$
```
```html
<p>This sentence uses <code>$</code> delimiters to show math inline:
<math-renderer><math xmlns="http://www.w3.org/1998/Math/MathML">
<msqrt><mn>3</mn><mi>x</mi><mo>−</mo><mn>1</mn></msqrt>
<mo>+</mo><mo>(</mo><mn>1</mn><mo>+</mo><mi>x</mi>
<msup><mo>)</mo><mn>2</mn></msup>
</math>
</math-renderer>
</p>
```
```markdown
**The Cauchy-Schwarz Inequality**\
$$\left( \sum_{k=1}^n a_k b_k \right)^2 \leq \left( \sum_{k=1}^n a_k^2 \right) \left( \sum_{k=1}^n b_k^2 \right)$$
```
```html
<p><strong>The Cauchy-Schwarz Inequality</strong><br>
<math-renderer>
<math xmlns="http://www.w3.org/1998/Math/MathML">
<msup>
<mrow><mo>(</mo>
<munderover><mo data-mjx-texclass="OP">∑</mo>
<mrow><mi>k</mi><mo>=</mo><mn>1</mn></mrow><mi>n</mi>
</munderover>
<msub><mi>a</mi><mi>k</mi></msub>
<msub><mi>b</mi><mi>k</mi></msub>
<mo>)</mo>
</mrow>
<mn>2</mn>
</msup>
<mo>≤</mo>
<mrow><mo>(</mo>
<munderover><mo>∑</mo>
<mrow><mi>k</mi><mo>=</mo><mn>1</mn></mrow>
<mi>n</mi>
</munderover>
<msubsup><mi>a</mi><mi>k</mi><mn>2</mn></msubsup>
<mo>)</mo>
</mrow>
<mrow><mo>(</mo>
<munderover><mo>∑</mo>
<mrow><mi>k</mi><mo>=</mo><mn>1</mn></mrow>
<mi>n</mi>
</munderover>
<msubsup><mi>b</mi><mi>k</mi><mn>2</mn></msubsup>
<mo>)</mo>
</mrow>
</math>
</math-renderer></p>
```
```
### Table Conversions
For more see [tables-to-html.md](references/tables-to-html.md)
```text
```markdown
| First Header | Second Header |
| ------------- | ------------- |
| Content Cell | Content Cell |
| Content Cell | Content Cell |
```
```html
<table>
<thead><tr><th>First Header</th><th>Second Header</th></tr></thead>
<tbody>
<tr><td>Content Cell</td><td>Content Cell</td></tr>
<tr><td>Content Cell</td><td>Content Cell</td></tr>
</tbody>
</table>
```
```markdown
| Left-aligned | Center-aligned | Right-aligned |
| :--- | :---: | ---: |
| git status | git status | git status |
| git diff | git diff | git diff |
```
```html
<table>
<thead>
<tr>
<th align="left">Left-aligned</th>
<th align="center">Center-aligned</th>
<th align="right">Right-aligned</th>
</tr>
</thead>
<tbody>
<tr>
<td align="left">git status</td>
<td align="center">git status</td>
<td align="right">git status</td>
</tr>
<tr>
<td align="left">git diff</td>
<td align="center">git diff</td>
<td align="right">git diff</td>
</tr>
</tbody>
</table>
```
```
## Working with [`markedJS/marked`](references/marked.md)
### Prerequisites
- Node.js installed (for CLI or programmatic usage)
- Install marked globally for CLI: `npm install -g marked`
- Or install locally: `npm install marked`
### Quick Conversion Methods
See [marked.md](references/marked.md) **Quick Conversion Methods**
### Step-by-Step Workflows
See [marked.md](references/marked.md) **Step-by-Step Workflows**
### CLI Configuration
### Using Config Files
Create `~/.marked.json` for persistent options:
```json
{
"gfm": true,
"breaks": true
}
```
Or use a custom config:
```bash
marked -i input.md -o output.html -c config.json
```
### CLI Options Reference
| Option | Description |
|--------|-------------|
| `-i, --input <file>` | Input Markdown file |
| `-o, --output <file>` | Output HTML file |
| `-s, --string <string>` | Parse string instead of file |
| `-c, --config <file>` | Use custom config file |
| `--gfm` | Enable GitHub Flavored Markdown |
| `--breaks` | Convert newlines to `<br>` |
| `--help` | Show all options |
### Security Warning
⚠️ **Marked does NOT sanitize output HTML.** For untrusted input, use a sanitizer:
```javascript
import { marked } from 'marked';
import DOMPurify from 'dompurify';
const unsafeHtml = marked.parse(untrustedMarkdown);
const safeHtml = DOMPurify.sanitize(unsafeHtml);
```
Recommended sanitizers:
- [DOMPurify](https://github.com/cure53/DOMPurify) (recommended)
- [sanitize-html](https://github.com/apostrophecms/sanitize-html)
- [js-xss](https://github.com/leizongmin/js-xss)
### Supported Markdown Flavors
| Flavor | Support |
|--------|---------|
| Original Markdown | 100% |
| CommonMark 0.31 | 98% |
| GitHub Flavored Markdown | 97% |
### Troubleshooting
| Issue | Solution |
|-------|----------|
| Special characters at file start | Strip zero-width chars: `content.replace(/^[\u200B\u200C\u200D\uFEFF]/,"")` |
| Code blocks not highlighting | Add a syntax highlighter like highlight.js |
| Tables not rendering | Ensure `gfm: true` option is set |
| Line breaks ignored | Set `breaks: true` in options |
| XSS vulnerability concerns | Use DOMPurify to sanitize output |
## Working with [`pandoc`](references/pandoc.md)
### Prerequisites
- Pandoc installed (download from <https://pandoc.org/installing.html>)
- For PDF output: LaTeX installation (MacTeX on macOS, MiKTeX on Windows, texlive on Linux)
- Terminal/command prompt access
### Quick Conversion Methods
#### Method 1: CLI Basic Conversion
```bash
# Convert markdown to HTML
pandoc input.md -o output.html
# Convert with standalone document (includes header/footer)
pandoc input.md -s -o output.html
# Explicit format specification
pandoc input.md -f markdown -t html -s -o output.html
```
#### Method 2: Filter Mode (Interactive)
```bash
# Start pandoc as a filter
pandoc
# Type markdown, then Ctrl-D (Linux/macOS) or Ctrl-Z+Enter (Windows)
Hello *pandoc*!
# Output: <p>Hello <em>pandoc</em>!</p>
```
#### Method 3: Format Conversion
```bash
# HTML to Markdown
pandoc -f html -t markdown input.html -o output.md
# Markdown to LaTeX
pandoc input.md -s -o output.tex
# Markdown to PDF (requires LaTeX)
pandoc input.md -s -o output.pdf
# Markdown to Word
pandoc input.md -s -o output.docx
```
### CLI Configuration
| Option | Description |
|--------|-------------|
| `-f, --from <format>` | Input format (markdown, html, latex, etc.) |
| `-t, --to <format>` | Output format (html, latex, pdf, docx, etc.) |
| `-s, --standalone` | Produce standalone document with header/footer |
| `-o, --output <file>` | Output file (inferred from extension) |
| `--mathml` | Convert TeX math to MathML |
| `--metadata title="Title"` | Set document metadata |
| `--toc` | Include table of contents |
| `--template <file>` | Use custom template |
| `--help` | Show all options |
### Security Warning
⚠️ **Pandoc processes input faithfully.** When converting untrusted markdown:
- Use `--sandbox` mode to disable external file access
- Validate input before processing
- Sanitize HTML output if displayed in browsers
```bash
# Run in sandbox mode for untrusted input
pandoc --sandbox input.md -o output.html
```
### Supported Markdown Flavors
| Flavor | Support |
|--------|---------|
| Pandoc Markdown | 100% (native) |
| CommonMark | Full (use `-f commonmark`) |
| GitHub Flavored Markdown | Full (use `-f gfm`) |
| MultiMarkdown | Partial |
### Troubleshooting
| Issue | Solution |
|-------|----------|
| PDF generation fails | Install LaTeX (MacTeX, MiKTeX, or texlive) |
| Encoding issues on Windows | Run `chcp 65001` before using pandoc |
| Missing standalone headers | Add `-s` flag for complete documents |
| Math not rendering | Use `--mathml` or `--mathjax` option |
| Tables not rendering | Ensure proper table syntax with pipes and dashes |
## Working with [`gomarkdown/markdown`](references/gomarkdown.md)
### Prerequisites
- Go 1.18 or higher installed
- Install the library: `go get github.com/gomarkdown/markdown`
- For CLI tool: `go install github.com/gomarkdown/mdtohtml@latest`
### Quick Conversion Methods
#### Method 1: Simple Conversion (Go)
```go
package main
import (
"fmt"
"github.com/gomarkdown/markdown"
)
func main() {
md := []byte("# Hello World\n\nThis is **bold** text.")
html := markdown.ToHTML(md, nil, nil)
fmt.Println(string(html))
}
```
#### Method 2: CLI Tool
```bash
# Install mdtohtml
go install github.com/gomarkdown/mdtohtml@latest
# Convert file
mdtohtml input.md output.html
# Convert file (output to stdout)
mdtohtml input.md
```
#### Method 3: Custom Parser and Renderer
```go
package main
import (
"github.com/gomarkdown/markdown"
"github.com/gomarkdown/markdown/html"
"github.com/gomarkdown/markdown/parser"
)
func mdToHTML(md []byte) []byte {
// Create parser with extensions
extensions := parser.CommonExtensions | parser.AutoHeadingIDs | parser.NoEmptyLineBeforeBlock
p := parser.NewWithExtensions(extensions)
doc := p.Parse(md)
// Create HTML renderer with extensions
htmlFlags := html.CommonFlags | html.HrefTargetBlank
opts := html.RendererOptions{Flags: htmlFlags}
renderer := html.NewRenderer(opts)
return markdown.Render(doc, renderer)
}
```
### CLI Configuration
The `mdtohtml` CLI tool has minimal options:
```bash
mdtohtml input-file [output-file]
```
For advanced configuration, use the Go library programmatically with parser and renderer options:
| Parser Extension | Description |
|------------------|-------------|
| `parser.CommonExtensions` | Tables, fenced code, autolinks, strikethrough, etc. |
| `parser.AutoHeadingIDs` | Generate IDs for headings |
| `parser.NoEmptyLineBeforeBlock` | No blank line needed before blocks |
| `parser.MathJax` | MathJax support for LaTeX math |
| HTML Flag | Description |
|-----------|-------------|
| `html.CommonFlags` | Common HTML output flags |
| `html.HrefTargetBlank` | Add `target="_blank"` to links |
| `html.CompletePage` | Generate complete HTML page |
| `html.UseXHTML` | Generate XHTML output |
### Security Warning
⚠️ **gomarkdown does NOT sanitize output HTML.** For untrusted input, use Bluemonday:
```go
import (
"github.com/microcosm-cc/bluemonday"
"github.com/gomarkdown/markdown"
)
maybeUnsafeHTML := markdown.ToHTML(md, nil, nil)
html := bluemonday.UGCPolicy().SanitizeBytes(maybeUnsafeHTML)
```
Recommended sanitizer: [Bluemonday](https://github.com/microcosm-cc/bluemonday)
### Supported Markdown Flavors
| Flavor | Support |
|--------|---------|
| Original Markdown | 100% |
| CommonMark | High (with extensions) |
| GitHub Flavored Markdown | High (tables, fenced code, strikethrough) |
| MathJax/LaTeX Math | Supported via extension |
| Mmark | Supported |
### Troubleshooting
| Issue | Solution |
|-------|----------|
| Windows/Mac newlines not parsed | Use `parser.NormalizeNewlines(input)` |
| Tables not rendering | Enable `parser.Tables` extension |
| Code blocks without highlighting | Integrate with syntax highlighter like Chroma |
| Math not rendering | Enable `parser.MathJax` extension |
| XSS vulnerabilities | Use Bluemonday to sanitize output |
## Working with [`jekyll`](references/jekyll.md)
### Prerequisites
- Ruby version 2.7.0 or higher
- RubyGems
- GCC and Make (for native extensions)
- Install Jekyll and Bundler: `gem install jekyll bundler`
### Quick Conversion Methods
#### Method 1: Create New Site
```bash
# Create a new Jekyll site
jekyll new myblog
# Change to site directory
cd myblog
# Build and serve locally
bundle exec jekyll serve
# Access at http://localhost:4000
```
#### Method 2: Build Static Site
```bash
# Build site to _site directory
bundle exec jekyll build
# Build with production environment
JEKYLL_ENV=production bundle exec jekyll build
```
#### Method 3: Live Reload Development
```bash
# Serve with live reload
bundle exec jekyll serve --livereload
# Serve with drafts
bundle exec jekyll serve --drafts
```
### CLI Configuration
| Command | Description |
|---------|-------------|
| `jekyll new <path>` | Create new Jekyll site |
| `jekyll build` | Build site to `_site` directory |
| `jekyll serve` | Build and serve locally |
| `jekyll clean` | Remove generated files |
| `jekyll doctor` | Check for configuration issues |
| Serve Options | Description |
|---------------|-------------|
| `--livereload` | Reload browser on changes |
| `--drafts` | Include draft posts |
| `--port <port>` | Set server port (default: 4000) |
| `--host <host>` | Set server host (default: localhost) |
| `--baseurl <url>` | Set base URL |
### Security Warning
⚠️ **Jekyll security considerations:**
- Avoid using `safe: false` in production
- Use `exclude` in `_config.yml` to prevent sensitive files from being published
- Sanitize user-generated content if accepting external input
- Keep Jekyll and plugins updated
```yaml
# _config.yml security settings
exclude:
- Gemfile
- Gemfile.lock
- node_modules
- vendor
```
### Supported Markdown Flavors
| Flavor | Support |
|--------|---------|
| Kramdown (default) | 100% |
| CommonMark | Via plugin (jekyll-commonmark) |
| GitHub Flavored Markdown | Via plugin (jekyll-commonmark-ghpages) |
| RedCarpet | Via plugin (deprecated) |
Configure markdown processor in `_config.yml`:
```yaml
markdown: kramdown
kramdown:
input: GFM
syntax_highlighter: rouge
```
### Troubleshooting
| Issue | Solution |
|-------|----------|
| Ruby 3.0+ fails to serve | Run `bundle add webrick` |
| Gem dependency errors | Run `bundle install` |
| Slow builds | Use `--incremental` flag |
| Liquid syntax errors | Check for unescaped `{` in content |
| Plugin not loading | Add to `_config.yml` plugins list |
## Working with [`hugo`](references/hugo.md)
### Prerequisites
- Hugo installed (download from <https://gohugo.io/installation/>)
- Git (recommended for themes and modules)
- Go (optional, for Hugo Modules)
### Quick Conversion Methods
#### Method 1: Create New Site
```bash
# Create a new Hugo site
hugo new site mysite
# Change to site directory
cd mysite
# Add a theme
git init
git submodule add https://github.com/theNewDynamic/gohugo-theme-ananke themes/ananke
echo "theme = 'ananke'" >> hugo.toml
# Create content
hugo new content posts/my-first-post.md
# Start development server
hugo server -D
```
#### Method 2: Build Static Site
```bash
# Build site to public directory
hugo
# Build with minification
hugo --minify
# Build for specific environment
hugo --environment production
```
#### Method 3: Development Server
```bash
# Start server with drafts
hugo server -D
# Start with live reload and bind to all interfaces
hugo server --bind 0.0.0.0 --baseURL http://localhost:1313/
# Start with specific port
hugo server --port 8080
```
### CLI Configuration
| Command | Description |
|---------|-------------|
| `hugo new site <name>` | Create new Hugo site |
| `hugo new content <path>` | Create new content file |
| `hugo` | Build site to `public` directory |
| `hugo server` | Start development server |
| `hugo mod init` | Initialize Hugo Modules |
| Build Options | Description |
|---------------|-------------|
| `-D, --buildDrafts` | Include draft content |
| `-E, --buildExpired` | Include expired content |
| `-F, --buildFuture` | Include future-dated content |
| `--minify` | Minify output |
| `--gc` | Run garbage collection after build |
| `-d, --destination <path>` | Output directory |
| Server Options | Description |
|----------------|-------------|
| `--bind <ip>` | Interface to bind to |
| `-p, --port <port>` | Port number (default: 1313) |
| `--liveReloadPort <port>` | Live reload port |
| `--disableLiveReload` | Disable live reload |
| `--navigateToChanged` | Navigate to changed content |
### Security Warning
⚠️ **Hugo security considerations:**
- Configure security policy in `hugo.toml` for external commands
- Use `--enableGitInfo` carefully with public repositories
- Validate shortcode parameters for user-generated content
```toml
# hugo.toml security settings
[security]
enableInlineShortcodes = false
[security.exec]
allow = ['^go$', '^npx$', '^postcss$']
[security.funcs]
getenv = ['^HUGO_', '^CI$']
[security.http]
methods = ['(?i)GET|POST']
urls = ['.*']
```
### Supported Markdown Flavors
| Flavor | Support |
|--------|---------|
| Goldmark (default) | 100% (CommonMark compliant) |
| GitHub Flavored Markdown | Full (tables, strikethrough, autolinks) |
| CommonMark | 100% |
| Blackfriday (legacy) | Deprecated, not recommended |
Configure markdown in `hugo.toml`:
```toml
[markup]
[markup.goldmark]
[markup.goldmark.extensions]
definitionList = true
footnote = true
linkify = true
strikethrough = true
table = true
taskList = true
[markup.goldmark.renderer]
unsafe = false # Set true to allow raw HTML
```
### Troubleshooting
| Issue | Solution |
|-------|----------|
| "Page not found" on paths | Check `baseURL` in config |
| Theme not loading | Verify theme in `themes/` or Hugo Modules |
| Slow builds | Use `--templateMetrics` to identify bottlenecks |
| Raw HTML not rendering | Set `unsafe = true` in goldmark config |
| Images not loading | Check `static/` folder structure |
| Module errors | Run `hugo mod tidy` |
## References
### Writing and Styling Markdown
- [basic-markdown.md](references/basic-markdown.md)
- [code-blocks.md](references/code-blocks.md)
- [collapsed-sections.md](references/collapsed-sections.md)
- [tables.md](references/tables.md)
- [writing-mathematical-expressions.md](references/writing-mathematical-expressions.md)
- Markdown Guide: <https://www.markdownguide.org/basic-syntax/>
- Styling Markdown: <https://github.com/sindresorhus/github-markdown-css>
### [`markedJS/marked`](references/marked.md)
- Official documentation: <https://marked.js.org/>
- Advanced options: <https://marked.js.org/using_advanced>
- Extensibility: <https://marked.js.org/using_pro>
- GitHub repository: <https://github.com/markedjs/marked>
### [`pandoc`](references/pandoc.md)
- Getting started: <https://pandoc.org/getting-started.html>
- Official documentation: <https://pandoc.org/MANUAL.html>
- Extensibility: <https://pandoc.org/extras.html>
- GitHub repository: <https://github.com/jgm/pandoc>
### [`gomarkdown/markdown`](references/gomarkdown.md)
- Official documentation: <https://pkg.go.dev/github.com/gomarkdown/markdown>
- Advanced configuration: <https://pkg.go.dev/github.com/gomarkdown/markdown@v0.0.0-20250810172220-2e2c11897d1a/html>
- Markdown processing: <https://blog.kowalczyk.info/article/cxn3/advanced-markdown-processing-in-go.html>
- GitHub repository: <https://github.com/gomarkdown/markdown>
### [`jekyll`](references/jekyll.md)
- Official documentation: <https://jekyllrb.com/docs/>
- Configuration options: <https://jekyllrb.com/docs/configuration/options/>
- Plugins: <https://jekyllrb.com/docs/plugins/>
- [Installation](https://jekyllrb.com/docs/plugins/installation/)
- [Generators](https://jekyllrb.com/docs/plugins/generators/)
- [Converters](https://jekyllrb.com/docs/plugins/converters/)
- [Commands](https://jekyllrb.com/docs/plugins/commands/)
- [Tags](https://jekyllrb.com/docs/plugins/tags/)
- [Filters](https://jekyllrb.com/docs/plugins/filters/)
- [Hooks](https://jekyllrb.com/docs/plugins/hooks/)
- GitHub repository: <https://github.com/jekyll/jekyll>
### [`hugo`](references/hugo.md)
- Official documentation: <https://gohugo.io/documentation/>
- All Settings: <https://gohugo.io/configuration/all/>
- Editor Plugins: <https://gohugo.io/tools/editors/>
- GitHub repository: <https://github.com/gohugoio/hugo>
references/
basic-markdown-to-html.md 4.2 KB
# Basic Markdown to HTML
## Headings
### Markdown
```md
# Basic writing and formatting syntax
```
### Parsed HTML
```html
<h1>Basic writing and formatting syntax</h1>
```
```md
## Headings
```
```html
<h2>Headings</h2>
```
```md
### A third-level heading
```
```html
<h3>A third-level heading</h3>
```
### Markdown
```md
Heading 2
---
```
### Parsed HTML
```html
<h2>Heading 2</h2>
```
---
## Paragraphs
### Markdown
```md
Create sophisticated formatting for your prose and code on GitHub with simple syntax.
```
### Parsed HTML
```html
<p>Create sophisticated formatting for your prose and code on GitHub with simple syntax.</p>
```
---
## Inline Formatting
### Bold
```md
**This is bold text**
```
```html
<strong>This is bold text</strong>
```
---
### Italic
```md
_This text is italicized_
```
```html
<em>This text is italicized</em>
```
---
### Bold + Italic
```md
***All this text is important***
```
```html
<strong><em>All this text is important</em></strong>
```
---
### Strikethrough (GFM)
```md
~~This was mistaken text~~
```
```html
<del>This was mistaken text</del>
```
---
### Subscript / Superscript (raw HTML passthrough)
```md
This is a <sub>subscript</sub> text
```
```html
<p>This is a <sub>subscript</sub> text</p>
```
```md
This is a <sup>superscript</sup> text
```
```html
<p>This is a <sup>superscript</sup> text</p>
```
---
## Blockquotes
### Markdown
```md
> Text that is a quote
```
### Parsed HTML
```html
<blockquote>
<p>Text that is a quote</p>
</blockquote>
```
---
### GitHub Alert (NOTE)
```md
> [!NOTE]
> Useful information.
```
```html
<blockquote class="markdown-alert markdown-alert-note">
<p><strong>Note</strong></p>
<p>Useful information.</p>
</blockquote>
```
> ⚠️ The `markdown-alert-*` classes are GitHub-specific, not standard Markdown.
---
## Inline Code
```md
Use `git status` to list files.
```
```html
<p>Use <code>git status</code> to list files.</p>
```
---
## Code Blocks
### Markdown
````md
```markdown
git status
git add
```
````
### Parsed HTML
```html
<pre><code class="language-markdown">
git status
git add
</code></pre>
```
---
## Tables
### Markdown
```md
| Style | Syntax |
|------|--------|
| Bold | ** ** |
```
### Parsed HTML
```html
<table>
<thead>
<tr>
<th>Style</th>
<th>Syntax</th>
</tr>
</thead>
<tbody>
<tr>
<td>Bold</td>
<td><strong> </strong></td>
</tr>
</tbody>
</table>
```
---
## Links
### Markdown
```md
[GitHub Pages](https://pages.github.com/)
```
### Parsed HTML
```html
<a href="https://pages.github.com/">GitHub Pages</a>
```
---
## Images
### Markdown
```md

```
### Parsed HTML
```html
<img src="image.png" alt="Alt text">
```
---
## Lists
### Unordered List
```md
- George Washington
- John Adams
```
```html
<ul>
<li>George Washington</li>
<li>John Adams</li>
</ul>
```
---
### Ordered List
```md
1. James Madison
2. James Monroe
```
```html
<ol>
<li>James Madison</li>
<li>James Monroe</li>
</ol>
```
---
### Nested Lists
```md
1. First item
- Nested item
```
```html
<ol>
<li>
First item
<ul>
<li>Nested item</li>
</ul>
</li>
</ol>
```
---
## Task Lists (GitHub Flavored Markdown)
```md
- [x] Done
- [ ] Pending
```
```html
<ul>
<li>
<input type="checkbox" checked disabled> Done
</li>
<li>
<input type="checkbox" disabled> Pending
</li>
</ul>
```
---
## Mentions
```md
@github/support
```
```html
<a href="https://github.com/github/support" class="user-mention">@github/support</a>
```
---
## Footnotes
### Markdown
```md
Here is a footnote[^1].
[^1]: My reference.
```
### Parsed HTML
```html
<p>
Here is a footnote
<sup id="fnref-1">
<a href="#fn-1">1</a>
</sup>.
</p>
<section class="footnotes">
<ol>
<li id="fn-1">
<p>My reference.</p>
</li>
</ol>
</section>
```
---
## HTML Comments (Hidden Content)
```md
<!-- This content will not appear -->
```
```html
<!-- This content will not appear -->
```
---
## Escaped Markdown Characters
```md
\*not italic\*
```
```html
<p>*not italic*</p>
```
---
## Emoji
```md
:+1:
```
```html
<img class="emoji" alt="👍" src="...">
```
(GitHub replaces emoji with `<img>` tags.)
---
basic-markdown.md 30.6 KB
# Basic writing and formatting syntax
Create sophisticated formatting for your prose and code on GitHub with simple syntax.
## Headings
To create a heading, add one to six <kbd>#</kbd> symbols before your heading text. The number of <kbd>#</kbd> you use will determine the hierarchy level and typeface size of the heading.
```markdown
# A first-level heading
## A second-level heading
### A third-level heading
```

When you use two or more headings, GitHub automatically generates a table of contents that you can access by clicking the "Outline" menu icon <svg version="1.1" width="16" height="16" viewBox="0 0 16 16" class="octicon octicon-list-unordered" aria-label="Table of Contents" role="img"><path d="M5.75 2.5h8.5a.75.75 0 0 1 0 1.5h-8.5a.75.75 0 0 1 0-1.5Zm0 5h8.5a.75.75 0 0 1 0 1.5h-8.5a.75.75 0 0 1 0-1.5Zm0 5h8.5a.75.75 0 0 1 0 1.5h-8.5a.75.75 0 0 1 0-1.5ZM2 14a1 1 0 1 1 0-2 1 1 0 0 1 0 2Zm1-6a1 1 0 1 1-2 0 1 1 0 0 1 2 0ZM2 4a1 1 0 1 1 0-2 1 1 0 0 1 0 2Z"></path></svg> within the file header. Each heading title is listed in the table of contents and you can click a title to navigate to the selected section.

## Styling text
You can indicate emphasis with bold, italic, strikethrough, subscript, or superscript text in comment fields and `.md` files.
| Style | Syntax | Keyboard shortcut | Example | Output | |
| ---------------------- | ------------------- | ------------------------------------------------------------------------------------- | ---------------------------------------- | -------------------------------------- | ------------------------------------------------- |
| Bold | `** **` or `__ __` | <kbd>Command</kbd>+<kbd>B</kbd> (Mac) or <kbd>Ctrl</kbd>+<kbd>B</kbd> (Windows/Linux) | `**This is bold text**` | **This is bold text** | |
| Italic | `* *` or `_ _` | <kbd>Command</kbd>+<kbd>I</kbd> (Mac) or <kbd>Ctrl</kbd>+<kbd>I</kbd> (Windows/Linux) | `_This text is italicized_` | *This text is italicized* | |
| Strikethrough | `~~ ~~` or `~ ~` | None | `~~This was mistaken text~~` | ~~This was mistaken text~~ | |
| Bold and nested italic | `** **` and `_ _` | None | `**This text is _extremely_ important**` | **This text is *extremely* important** | |
| All bold and italic | `*** ***` | None | `***All this text is important***` | ***All this text is important*** | <!-- markdownlint-disable-line emphasis-style --> |
| Subscript | `<sub> </sub>` | None | `This is a <sub>subscript</sub> text` | This is a <sub>subscript</sub> text | |
| Superscript | `<sup> </sup>` | None | `This is a <sup>superscript</sup> text` | This is a <sup>superscript</sup> text | |
| Underline | `<ins> </ins>` | None | `This is an <ins>underlined</ins> text` | This is an <ins>underlined</ins> text | |
## Quoting text
You can quote text with a <kbd>></kbd>.
```markdown
Text that is not a quote
> Text that is a quote
```
Quoted text is indented with a vertical line on the left and displayed using gray type.

> \[!NOTE]
> When viewing a conversation, you can automatically quote text in a comment by highlighting the text, then typing <kbd>R</kbd>. You can quote an entire comment by clicking <svg version="1.1" width="16" height="16" viewBox="0 0 16 16" class="octicon octicon-kebab-horizontal" aria-label="The horizontal kebab icon" role="img"><path d="M8 9a1.5 1.5 0 1 0 0-3 1.5 1.5 0 0 0 0 3ZM1.5 9a1.5 1.5 0 1 0 0-3 1.5 1.5 0 0 0 0 3Zm13 0a1.5 1.5 0 1 0 0-3 1.5 1.5 0 0 0 0 3Z"></path></svg>, then **Quote reply**. For more information about keyboard shortcuts, see [Keyboard shortcuts](https://docs.github.com/en/get-started/accessibility/keyboard-shortcuts).
## Quoting code
You can call out code or a command within a sentence with single backticks. The text within the backticks will not be formatted. You can also press the <kbd>Command</kbd>+<kbd>E</kbd> (Mac) or <kbd>Ctrl</kbd>+<kbd>E</kbd> (Windows/Linux) keyboard shortcut to insert the backticks for a code block within a line of Markdown.
```markdown
Use `git status` to list all new or modified files that haven't yet been committed.
```

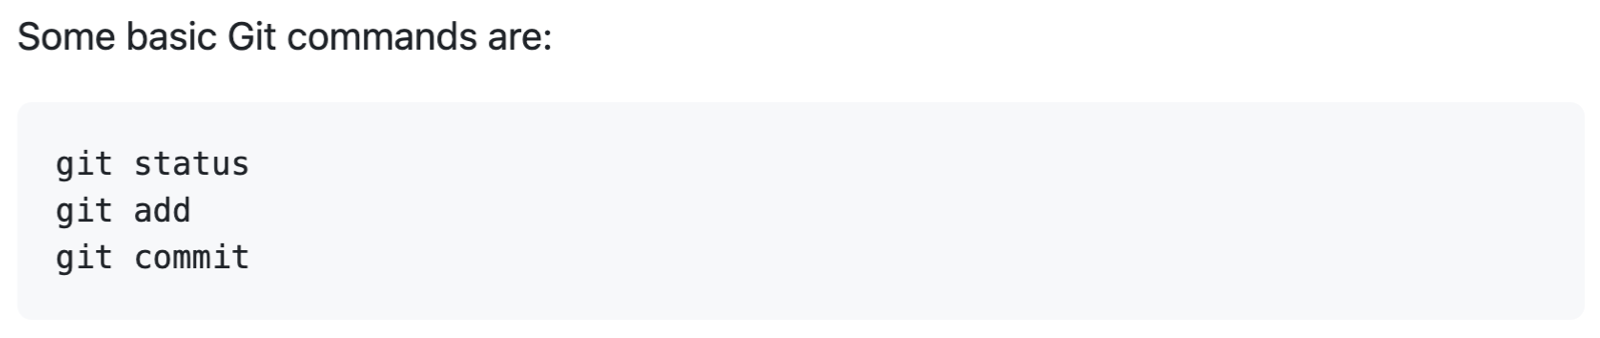
To format code or text into its own distinct block, use triple backticks.
````markdown
Some basic Git commands are:
```
git status
git add
git commit
```
````
For more information, see [Creating and highlighting code blocks](https://docs.github.com/en/get-started/writing-on-github/working-with-advanced-formatting/creating-and-highlighting-code-blocks).
If you are frequently editing code snippets and tables, you may benefit from enabling a fixed-width font in all comment fields on GitHub. For more information, see [About writing and formatting on GitHub](https://docs.github.com/en/get-started/writing-on-github/getting-started-with-writing-and-formatting-on-github/about-writing-and-formatting-on-github#enabling-fixed-width-fonts-in-the-editor).
## Supported color models
In issues, pull requests, and discussions, you can call out colors within a sentence by using backticks. A supported color model within backticks will display a visualization of the color.
```markdown
The background color is `#ffffff` for light mode and `#000000` for dark mode.
```

Here are the currently supported color models.
| Color | Syntax | Example | Output |
| ----- | --------------------------- | ----------------------------------- | ------------------------------------------------------------------------------------------------------------------------------------------------------------------------------ |
| HEX | <code>\`#RRGGBB\`</code> | <code>\`#0969DA\`</code> |  |
| RGB | <code>\`rgb(R,G,B)\`</code> | <code>\`rgb(9, 105, 218)\`</code> |  |
| HSL | <code>\`hsl(H,S,L)\`</code> | <code>\`hsl(212, 92%, 45%)\`</code> |  |
> \[!NOTE]
>
> * A supported color model cannot have any leading or trailing spaces within the backticks.
> * The visualization of the color is only supported in issues, pull requests, and discussions.
## Links
You can create an inline link by wrapping link text in brackets `[ ]`, and then wrapping the URL in parentheses `( )`. You can also use the keyboard shortcut <kbd>Command</kbd>+<kbd>K</kbd> to create a link. When you have text selected, you can paste a URL from your clipboard to automatically create a link from the selection.
You can also create a Markdown hyperlink by highlighting the text and using the keyboard shortcut <kbd>Command</kbd>+<kbd>V</kbd>. If you'd like to replace the text with the link, use the keyboard shortcut <kbd>Command</kbd>+<kbd>Shift</kbd>+<kbd>V</kbd>.
`This site was built using [GitHub Pages](https://pages.github.com/).`

> \[!NOTE]
> GitHub automatically creates links when valid URLs are written in a comment. For more information, see [Autolinked references and URLs](https://docs.github.com/en/get-started/writing-on-github/working-with-advanced-formatting/autolinked-references-and-urls).
## Section links
You can link directly to any section that has a heading. To view the automatically generated anchor in a rendered file, hover over the section heading to expose the <svg version="1.1" width="16" height="16" viewBox="0 0 16 16" class="octicon octicon-link" aria-label="the link" role="img"><path d="m7.775 3.275 1.25-1.25a3.5 3.5 0 1 1 4.95 4.95l-2.5 2.5a3.5 3.5 0 0 1-4.95 0 .751.751 0 0 1 .018-1.042.751.751 0 0 1 1.042-.018 1.998 1.998 0 0 0 2.83 0l2.5-2.5a2.002 2.002 0 0 0-2.83-2.83l-1.25 1.25a.751.751 0 0 1-1.042-.018.751.751 0 0 1-.018-1.042Zm-4.69 9.64a1.998 1.998 0 0 0 2.83 0l1.25-1.25a.751.751 0 0 1 1.042.018.751.751 0 0 1 .018 1.042l-1.25 1.25a3.5 3.5 0 1 1-4.95-4.95l2.5-2.5a3.5 3.5 0 0 1 4.95 0 .751.751 0 0 1-.018 1.042.751.751 0 0 1-1.042.018 1.998 1.998 0 0 0-2.83 0l-2.5 2.5a1.998 1.998 0 0 0 0 2.83Z"></path></svg> icon and click the icon to display the anchor in your browser.

If you need to determine the anchor for a heading in a file you are editing, you can use the following basic rules:
* Letters are converted to lower-case.
* Spaces are replaced by hyphens (`-`). Any other whitespace or punctuation characters are removed.
* Leading and trailing whitespace are removed.
* Markup formatting is removed, leaving only the contents (for example, `_italics_` becomes `italics`).
* If the automatically generated anchor for a heading is identical to an earlier anchor in the same document, a unique identifier is generated by appending a hyphen and an auto-incrementing integer.
For more detailed information on the requirements of URI fragments, see [RFC 3986: Uniform Resource Identifier (URI): Generic Syntax, Section 3.5](https://www.rfc-editor.org/rfc/rfc3986#section-3.5).
The code block below demonstrates the basic rules used to generate anchors from headings in rendered content.
```markdown
# Example headings
## Sample Section
## This'll be a _Helpful_ Section About the Greek Letter Θ!
A heading containing characters not allowed in fragments, UTF-8 characters, two consecutive spaces between the first and second words, and formatting.
## This heading is not unique in the file
TEXT 1
## This heading is not unique in the file
TEXT 2
# Links to the example headings above
Link to the sample section: [Link Text](#sample-section).
Link to the helpful section: [Link Text](#thisll-be-a-helpful-section-about-the-greek-letter-Θ).
Link to the first non-unique section: [Link Text](#this-heading-is-not-unique-in-the-file).
Link to the second non-unique section: [Link Text](#this-heading-is-not-unique-in-the-file-1).
```
> \[!NOTE]
> If you edit a heading, or if you change the order of headings with "identical" anchors, you will also need to update any links to those headings as the anchors will change.
## Relative links
You can define relative links and image paths in your rendered files to help readers navigate to other files in your repository.
A relative link is a link that is relative to the current file. For example, if you have a README file in root of your repository, and you have another file in *docs/CONTRIBUTING.md*, the relative link to *CONTRIBUTING.md* in your README might look like this:
```text
[Contribution guidelines for this project](docs/CONTRIBUTING.md)
```
GitHub will automatically transform your relative link or image path based on whatever branch you're currently on, so that the link or path always works. The path of the link will be relative to the current file. Links starting with `/` will be relative to the repository root. You can use all relative link operands, such as `./` and `../`.
Your link text should be on a single line. The example below will not work.
```markdown
[Contribution
guidelines for this project](docs/CONTRIBUTING.md)
```
Relative links are easier for users who clone your repository. Absolute links may not work in clones of your repository - we recommend using relative links to refer to other files within your repository.
## Custom anchors
You can use standard HTML anchor tags (`<a name="unique-anchor-name"></a>`) to create navigation anchor points for any location in the document. To avoid ambiguous references, use a unique naming scheme for anchor tags, such as adding a prefix to the `name` attribute value.
> \[!NOTE]
> Custom anchors will not be included in the document outline/Table of Contents.
You can link to a custom anchor using the value of the `name` attribute you gave the anchor. The syntax is exactly the same as when you link to an anchor that is automatically generated for a heading.
For example:
```markdown
# Section Heading
Some body text of this section.
<a name="my-custom-anchor-point"></a>
Some text I want to provide a direct link to, but which doesn't have its own heading.
(… more content…)
[A link to that custom anchor](#my-custom-anchor-point)
```
> \[!TIP]
> Custom anchors are not considered by the automatic naming and numbering behavior of automatic heading links.
## Line breaks
If you're writing in issues, pull requests, or discussions in a repository, GitHub will render a line break automatically:
```markdown
This example
Will span two lines
```
However, if you are writing in an .md file, the example above would render on one line without a line break. To create a line break in an .md file, you will need to include one of the following:
* Include two spaces at the end of the first line.
<pre>
This example
Will span two lines
</pre>
* Include a backslash at the end of the first line.
```markdown
This example\
Will span two lines
```
* Include an HTML single line break tag at the end of the first line.
```markdown
This example<br/>
Will span two lines
```
If you leave a blank line between two lines, both .md files and Markdown in issues, pull requests, and discussions will render the two lines separated by the blank line:
```markdown
This example
Will have a blank line separating both lines
```
## Images
You can display an image by adding <kbd>!</kbd> and wrapping the alt text in `[ ]`. Alt text is a short text equivalent of the information in the image. Then, wrap the link for the image in parentheses `()`.
``

GitHub supports embedding images into your issues, pull requests, discussions, comments and `.md` files. You can display an image from your repository, add a link to an online image, or upload an image. For more information, see [Uploading assets](#uploading-assets).
> \[!NOTE]
> When you want to display an image that is in your repository, use relative links instead of absolute links.
Here are some examples for using relative links to display an image.
| Context | Relative Link |
| ----------------------------------------------------------- | ---------------------------------------------------------------------- |
| In a `.md` file on the same branch | `/assets/images/electrocat.png` |
| In a `.md` file on another branch | `/../main/assets/images/electrocat.png` |
| In issues, pull requests and comments of the repository | `../blob/main/assets/images/electrocat.png?raw=true` |
| In a `.md` file in another repository | `/../../../../github/docs/blob/main/assets/images/electrocat.png` |
| In issues, pull requests and comments of another repository | `../../../github/docs/blob/main/assets/images/electrocat.png?raw=true` |
> \[!NOTE]
> The last two relative links in the table above will work for images in a private repository only if the viewer has at least read access to the private repository that contains these images.
For more information, see [Relative Links](#relative-links).
### The Picture element
The `<picture>` HTML element is supported.
## Lists
You can make an unordered list by preceding one or more lines of text with <kbd>-</kbd>, <kbd>\*</kbd>, or <kbd>+</kbd>.
```markdown
- George Washington
* John Adams
+ Thomas Jefferson
```

To order your list, precede each line with a number.
```markdown
1. James Madison
2. James Monroe
3. John Quincy Adams
```

### Nested Lists
You can create a nested list by indenting one or more list items below another item.
To create a nested list using the web editor on GitHub or a text editor that uses a monospaced font, like [Visual Studio Code](https://code.visualstudio.com/), you can align your list visually. Type space characters in front of your nested list item until the list marker character (<kbd>-</kbd> or <kbd>\*</kbd>) lies directly below the first character of the text in the item above it.
```markdown
1. First list item
- First nested list item
- Second nested list item
```
> \[!NOTE]
> In the web-based editor, you can indent or dedent one or more lines of text by first highlighting the desired lines and then using <kbd>Tab</kbd> or <kbd>Shift</kbd>+<kbd>Tab</kbd> respectively.


To create a nested list in the comment editor on GitHub, which doesn't use a monospaced font, you can look at the list item immediately above the nested list and count the number of characters that appear before the content of the item. Then type that number of space characters in front of the nested list item.
In this example, you could add a nested list item under the list item `100. First list item` by indenting the nested list item a minimum of five spaces, since there are five characters (`100. `) before `First list item`.
```markdown
100. First list item
- First nested list item
```

You can create multiple levels of nested lists using the same method. For example, because the first nested list item has seven characters (`␣␣␣␣␣-␣`) before the nested list content `First nested list item`, you would need to indent the second nested list item by at least two more characters (nine spaces minimum).
```markdown
100. First list item
- First nested list item
- Second nested list item
```

For more examples, see the [GitHub Flavored Markdown Spec](https://github.github.com/gfm/#example-265).
## Task lists
To create a task list, preface list items with a hyphen and space followed by `[ ]`. To mark a task as complete, use `[x]`.
```markdown
- [x] #739
- [ ] https://github.com/octo-org/octo-repo/issues/740
- [ ] Add delight to the experience when all tasks are complete :tada:
```

If a task list item description begins with a parenthesis, you'll need to escape it with <kbd>\\</kbd>:
`- [ ] \(Optional) Open a followup issue`
For more information, see [About tasklists](https://docs.github.com/en/get-started/writing-on-github/working-with-advanced-formatting/about-task-lists).
## Mentioning people and teams
You can mention a person or [team](https://docs.github.com/en/organizations/organizing-members-into-teams) on GitHub by typing <kbd>@</kbd> plus their username or team name. This will trigger a notification and bring their attention to the conversation. People will also receive a notification if you edit a comment to mention their username or team name. For more information about notifications, see [About notifications](https://docs.github.com/en/account-and-profile/managing-subscriptions-and-notifications-on-github/setting-up-notifications/about-notifications).
> \[!NOTE]
> A person will only be notified about a mention if the person has read access to the repository and, if the repository is owned by an organization, the person is a member of the organization.
`@github/support What do you think about these updates?`

When you mention a parent team, members of its child teams also receive notifications, simplifying communication with multiple groups of people. For more information, see [About organization teams](https://docs.github.com/en/organizations/organizing-members-into-teams/about-teams).
Typing an <kbd>@</kbd> symbol will bring up a list of people or teams on a project. The list filters as you type, so once you find the name of the person or team you are looking for, you can use the arrow keys to select it and press either tab or enter to complete the name. For teams, enter the @organization/team-name and all members of that team will get subscribed to the conversation.
The autocomplete results are restricted to repository collaborators and any other participants on the thread.
## Referencing issues and pull requests
You can bring up a list of suggested issues and pull requests within the repository by typing <kbd>#</kbd>. Type the issue or pull request number or title to filter the list, and then press either tab or enter to complete the highlighted result.
For more information, see [Autolinked references and URLs](https://docs.github.com/en/get-started/writing-on-github/working-with-advanced-formatting/autolinked-references-and-urls).
## Referencing external resources
If custom autolink references are configured for a repository, then references to external resources, like a JIRA issue or Zendesk ticket, convert into shortened links. To know which autolinks are available in your repository, contact someone with admin permissions to the repository. For more information, see [Configuring autolinks to reference external resources](https://docs.github.com/en/repositories/managing-your-repositorys-settings-and-features/managing-repository-settings/configuring-autolinks-to-reference-external-resources).
## Uploading assets
You can upload assets like images by dragging and dropping, selecting from a file browser, or pasting. You can upload assets to issues, pull requests, comments, and `.md` files in your repository.
## Using emojis
You can add emoji to your writing by typing `:EMOJICODE:`, a colon followed by the name of the emoji.
`@octocat :+1: This PR looks great - it's ready to merge! :shipit:`

Typing <kbd>:</kbd> will bring up a list of suggested emoji. The list will filter as you type, so once you find the emoji you're looking for, press **Tab** or **Enter** to complete the highlighted result.
For a full list of available emoji and codes, see [the Emoji-Cheat-Sheet](https://github.com/ikatyang/emoji-cheat-sheet/blob/github-actions-auto-update/README.md).
## Paragraphs
You can create a new paragraph by leaving a blank line between lines of text.
## Footnotes
You can add footnotes to your content by using this bracket syntax:
```text
Here is a simple footnote[^1].
A footnote can also have multiple lines[^2].
[^1]: My reference.
[^2]: To add line breaks within a footnote, add 2 spaces to the end of a line.
This is a second line.
```
The footnote will render like this:

> \[!NOTE]
> The position of a footnote in your Markdown does not influence where the footnote will be rendered. You can write a footnote right after your reference to the footnote, and the footnote will still render at the bottom of the Markdown. Footnotes are not supported in wikis.
## Alerts
**Alerts**, also sometimes known as **callouts** or **admonitions**, are a Markdown extension based on the blockquote syntax that you can use to emphasize critical information. On GitHub, they are displayed with distinctive colors and icons to indicate the significance of the content.
Use alerts only when they are crucial for user success and limit them to one or two per article to prevent overloading the reader. Additionally, you should avoid placing alerts consecutively. Alerts cannot be nested within other elements.
To add an alert, use a special blockquote line specifying the alert type, followed by the alert information in a standard blockquote. Five types of alerts are available:
```markdown
> [!NOTE]
> Useful information that users should know, even when skimming content.
> [!TIP]
> Helpful advice for doing things better or more easily.
> [!IMPORTANT]
> Key information users need to know to achieve their goal.
> [!WARNING]
> Urgent info that needs immediate user attention to avoid problems.
> [!CAUTION]
> Advises about risks or negative outcomes of certain actions.
```
Here are the rendered alerts:

## Hiding content with comments
You can tell GitHub to hide content from the rendered Markdown by placing the content in an HTML comment.
```text
<!-- This content will not appear in the rendered Markdown -->
```
## Ignoring Markdown formatting
You can tell GitHub to ignore (or escape) Markdown formatting by using <kbd>\\</kbd> before the Markdown character.
`Let's rename \*our-new-project\* to \*our-old-project\*.`

For more information on backslashes, see Daring Fireball's [Markdown Syntax](https://daringfireball.net/projects/markdown/syntax#backslash).
> \[!NOTE]
> The Markdown formatting will not be ignored in the title of an issue or a pull request.
## Disabling Markdown rendering
When viewing a Markdown file, you can click **Code** at the top of the file to disable Markdown rendering and view the file's source instead.

Disabling Markdown rendering enables you to use source view features, such as line linking, which is not possible when viewing rendered Markdown files.
## Further reading
*[GitHub Flavored Markdown Spec](https://github.github.com/gfm/)
*[About writing and formatting on GitHub](https://docs.github.com/en/get-started/writing-on-github/getting-started-with-writing-and-formatting-on-github/about-writing-and-formatting-on-github)
*[Working with advanced formatting](https://docs.github.com/en/get-started/writing-on-github/working-with-advanced-formatting)
*[Quickstart for writing on GitHub](https://docs.github.com/en/get-started/writing-on-github/getting-started-with-writing-and-formatting-on-github/quickstart-for-writing-on-github)code-blocks-to-html.md 2.6 KB
# Code Blocks to HTML

## Fenced Code Blocks (No Language)

### Markdown

```
function test() {
  console.log("notice the blank line before this function?");
}
```

### Parsed HTML

```html
<pre><code>
function test() {
  console.log("notice the blank line before this function?");
}
</code></pre>
```

---

## GitHub Tip Callout

### Markdown

```md
> [!TIP]
> To preserve your formatting within a list, make sure to indent non-fenced code blocks by eight spaces.
```

### Parsed HTML (GitHub-specific)

```html
<blockquote class="markdown-alert markdown-alert-tip">
  <p><strong>Tip</strong></p>
  <p>To preserve your formatting within a list, make sure to indent non-fenced code blocks by eight spaces.</p>
</blockquote>
```

---

## Showing Backticks Inside Code Blocks

### Markdown

`````md
    ````
    ```
    Look! You can see my backticks.
    ```
    ````
`````

### Parsed HTML

```html
    <pre><code>
    ```

    Look! You can see my backticks.

    ```
    </code></pre>
```

## Syntax Highlighting (Language Identifier)

### Markdown

```ruby
require 'redcarpet'
markdown = Redcarpet.new("Hello World!")
puts markdown.to_html
```

### Parsed HTML

```html
<pre><code class="language-ruby">
require 'redcarpet'
markdown = Redcarpet.new("Hello World!")
puts markdown.to_html
</code></pre>
```

> The `language-ruby` class is consumed by GitHub’s syntax highlighter (Linguist + grammar).

### Summary: Syntax-Highlighting Rules (HTML-Level)

| Markdown fence | Parsed `<code>` tag            |
| -------------- | ------------------------------ |
| ```js          | `<code class="language-js">`   |
| ```html        | `<code class="language-html">` |
| ```md          | `<code class="language-md">`   |
| ``` (no lang)  | `<code>`                       |

---

## HTML Comments (Ignored by Renderer)

```md
<!-- Internal documentation comment -->
```

```html
<!-- Internal documentation comment -->
```

---

## Links

```md
[About writing and formatting on GitHub](https://docs.github.com/...)
```

```html
<a href="https://docs.github.com/...">About writing and formatting on GitHub</a>
```

---

## Lists

```md
* [GitHub Flavored Markdown Spec](https://github.github.com/gfm/)
```

```html
<ul>
  <li>
    <a href="https://github.github.com/gfm/">GitHub Flavored Markdown Spec</a>
  </li>
</ul>
```

---

## Diagrams (Conceptual Parsing)

### Markdown

````md
```mermaid
graph TD
  A --> B
```
````

### Parsed HTML

```html
<pre><code class="language-mermaid">
graph TD
  A --> B
</code></pre>
```

## Closing Notes

* No `language-*` class appears here because **no language identifier** was provided.
* The inner triple backticks are preserved **as literal text** inside `<code>`.
code-blocks.md 3.7 KB
# Creating and highlighting code blocks
Share samples of code with fenced code blocks and enabling syntax highlighting.
## Fenced code blocks
You can create fenced code blocks by placing triple backticks <code>\`\`\`</code> before and after the code block. We recommend placing a blank line before and after code blocks to make the raw formatting easier to read.
````text
```
function test() {
console.log("notice the blank line before this function?");
}
```
````

> \[!TIP]
> To preserve your formatting within a list, make sure to indent non-fenced code blocks by eight spaces.
To display triple backticks in a fenced code block, wrap them inside quadruple backticks.
`````text
````
```
Look! You can see my backticks.
```
````
`````

If you are frequently editing code snippets and tables, you may benefit from enabling a fixed-width font in all comment fields on GitHub. For more information, see [About writing and formatting on GitHub](https://docs.github.com/get-started/writing-on-github/getting-started-with-writing-and-formatting-on-github/about-writing-and-formatting-on-github#enabling-fixed-width-fonts-in-the-editor).
## Syntax highlighting
<!-- If you make changes to this feature, check whether any of the changes affect languages listed in /get-started/learning-about-github/github-language-support. If so, please update the language support article accordingly. -->
You can add an optional language identifier to enable syntax highlighting in your fenced code block.
Syntax highlighting changes the color and style of source code to make it easier to read.
For example, to syntax highlight Ruby code:
````text
```ruby
require 'redcarpet'
markdown = Redcarpet.new("Hello World!")
puts markdown.to_html
```
````
This will display the code block with syntax highlighting:

> \[!TIP]
> When you create a fenced code block that you also want to have syntax highlighting on a GitHub Pages site, use lower-case language identifiers. For more information, see [About GitHub Pages and Jekyll](https://docs.github.com/pages/setting-up-a-github-pages-site-with-jekyll/about-github-pages-and-jekyll#syntax-highlighting).
We use [Linguist](https://github.com/github-linguist/linguist) to perform language detection and to select [third-party grammars](https://github.com/github-linguist/linguist/blob/main/vendor/README.md) for syntax highlighting. You can find out which keywords are valid in [the languages YAML file](https://github.com/github-linguist/linguist/blob/main/lib/linguist/languages.yml).
## Creating diagrams
You can also use code blocks to create diagrams in Markdown. GitHub supports Mermaid, GeoJSON, TopoJSON, and ASCII STL syntax. For more information, see [Creating diagrams](https://docs.github.com/get-started/writing-on-github/working-with-advanced-formatting/creating-diagrams).
## Further reading
* [GitHub Flavored Markdown Spec](https://github.github.com/gfm/)
* [Basic writing and formatting syntax](https://docs.github.com/get-started/writing-on-github/getting-started-with-writing-and-formatting-on-github/basic-writing-and-formatting-syntax)collapsed-sections-to-html.md 2.5 KB
# Collapsed Sections to HTML
## `<details>` Block (Raw HTML in Markdown)
### Markdown
````md
<details>
<summary>Tips for collapsed sections</summary>
### You can add a header
You can add text within a collapsed section.
You can add an image or a code block, too.
```ruby
puts "Hello World"
```
</details>
````
---
### Parsed HTML
```html
<details>
<summary>Tips for collapsed sections</summary>
<h3>You can add a header</h3>
<p>You can add text within a collapsed section.</p>
<p>You can add an image or a code block, too.</p>
<pre><code class="language-ruby">
puts "Hello World"
</code></pre>
</details>
```
#### Notes:
* Markdown **inside `<details>`** is still parsed normally.
* Syntax highlighting is preserved via `class="language-ruby"`.
---
## Open by Default (`open` attribute)
### Markdown
````md
<details open>
<summary>Tips for collapsed sections</summary>
### You can add a header
You can add text within a collapsed section.
You can add an image or a code block, too.
```ruby
puts "Hello World"
```
</details>
````
### Parsed HTML
```html
<details open>
<summary>Tips for collapsed sections</summary>
<h3>You can add a header</h3>
<p>You can add text within a collapsed section.</p>
<p>You can add an image or a code block, too.</p>
<pre><code class="language-ruby">
puts "Hello World"
</code></pre>
</details>
```
## Key Rules
* `<details>` and `<summary>` are **raw HTML**, not Markdown syntax
* Markdown inside `<details>` **is still parsed**
* Syntax highlighting works normally inside collapsed sections
* Use `<summary>` as the **clickable label**
## Paragraphs with Inline HTML & SVG
### Markdown
```md
You can streamline your Markdown by creating a collapsed section with the `<details>` tag.
```
### Parsed HTML
```html
<p>
You can streamline your Markdown by creating a collapsed section with the <code><details></code> tag.
</p>
```
---
### Markdown (inline SVG preserved)
```md
Any Markdown within the `<details>` block will be collapsed until the reader clicks <svg ...></svg> to expand the details.
```
### Parsed HTML
```html
<p>
Any Markdown within the <code><details></code> block will be collapsed until the reader clicks
<svg version="1.1" width="16" height="16" viewBox="0 0 16 16"
class="octicon octicon-triangle-right"
aria-label="The right triangle icon"
role="img">
<path d="m6.427 4.427 3.396 3.396a.25.25 0 0 1 0 .354l-3.396 3.396A.25.25 0 0 1 6 11.396V4.604a.25.25 0 0 1 .427-.177Z"></path>
</svg>
to expand the details.
</p>
```
collapsed-sections.md 2.7 KB
# Organizing information with collapsed sections
You can streamline your Markdown by creating a collapsed section with the `<details>` tag.
## Creating a collapsed section
You can temporarily obscure sections of your Markdown by creating a collapsed section that the reader can choose to expand. For example, when you want to include technical details in an issue comment that may not be relevant or interesting to every reader, you can put those details in a collapsed section.
Any Markdown within the `<details>` block will be collapsed until the reader clicks <svg version="1.1" width="16" height="16" viewBox="0 0 16 16" class="octicon octicon-triangle-right" aria-label="The right triangle icon" role="img"><path d="m6.427 4.427 3.396 3.396a.25.25 0 0 1 0 .354l-3.396 3.396A.25.25 0 0 1 6 11.396V4.604a.25.25 0 0 1 .427-.177Z"></path></svg> to expand the details.
Within the `<details>` block, use the `<summary>` tag to let readers know what is inside. The label appears to the right of <svg version="1.1" width="16" height="16" viewBox="0 0 16 16" class="octicon octicon-triangle-right" aria-label="The right triangle icon" role="img"><path d="m6.427 4.427 3.396 3.396a.25.25 0 0 1 0 .354l-3.396 3.396A.25.25 0 0 1 6 11.396V4.604a.25.25 0 0 1 .427-.177Z"></path></svg>.
````markdown
<details>
<summary>Tips for collapsed sections</summary>
### You can add a header
You can add text within a collapsed section.
You can add an image or a code block, too.
```ruby
puts "Hello World"
```
</details>
````
The Markdown inside the `<summary>` label will be collapsed by default:

After a reader clicks <svg version="1.1" width="16" height="16" viewBox="0 0 16 16" class="octicon octicon-triangle-right" aria-label="The right triangle icon" role="img"><path d="m6.427 4.427 3.396 3.396a.25.25 0 0 1 0 .354l-3.396 3.396A.25.25 0 0 1 6 11.396V4.604a.25.25 0 0 1 .427-.177Z"></path></svg>, the details are expanded:

Optionally, to make the section display as open by default, add the `open` attribute to the `<details>` tag:
```html
<details open>
```
## Further reading
* [GitHub Flavored Markdown Spec](https://github.github.com/gfm/)
* [Basic writing and formatting syntax](https://docs.github.com/get-started/writing-on-github/getting-started-with-writing-and-formatting-on-github/basic-writing-and-formatting-syntax)gomarkdown.md 6.1 KB
# gomarkdown/markdown Reference

Go library for parsing Markdown and rendering HTML. Fast, extensible, and thread-safe.

## Installation

```bash
# Add to your Go project
go get github.com/gomarkdown/markdown

# Install CLI tool
go install github.com/gomarkdown/mdtohtml@latest
```

## Basic Usage

### Simple Conversion

```go
package main

import (
    "fmt"
    "github.com/gomarkdown/markdown"
)

func main() {
    md := []byte("# Hello World\n\nThis is **bold** text.")
    html := markdown.ToHTML(md, nil, nil)
    fmt.Println(string(html))
}
```

### Using CLI Tool

```bash
# Convert file to HTML
mdtohtml input.md output.html

# Output to stdout
mdtohtml input.md
```

## Parser Configuration

### Common Extensions

```go
import (
    "github.com/gomarkdown/markdown"
    "github.com/gomarkdown/markdown/parser"
)

// Create parser with extensions
extensions := parser.CommonExtensions | parser.AutoHeadingIDs
p := parser.NewWithExtensions(extensions)

// Parse markdown
doc := p.Parse(md)
```

### Available Parser Extensions

| Extension | Description |
|-----------|-------------|
| `parser.CommonExtensions` | Tables, fenced code, autolinks, strikethrough |
| `parser.Tables` | Pipe tables support |
| `parser.FencedCode` | Fenced code blocks with language |
| `parser.Autolink` | Auto-detect URLs |
| `parser.Strikethrough` | ~~strikethrough~~ text |
| `parser.SpaceHeadings` | Require space after # in headings |
| `parser.HeadingIDs` | Custom heading IDs {#id} |
| `parser.AutoHeadingIDs` | Auto-generate heading IDs |
| `parser.Footnotes` | Footnote support |
| `parser.NoEmptyLineBeforeBlock` | No blank line required before blocks |
| `parser.HardLineBreak` | Newlines become `<br>` |
| `parser.MathJax` | MathJax support |
| `parser.SuperSubscript` | Super^script^ and sub~script~ |
| `parser.Mmark` | Mmark syntax support |

## HTML Renderer Configuration

### Common Flags

```go
import (
    "github.com/gomarkdown/markdown"
    "github.com/gomarkdown/markdown/html"
    "github.com/gomarkdown/markdown/parser"
)

// Parser
p := parser.NewWithExtensions(parser.CommonExtensions)

// Renderer
htmlFlags := html.CommonFlags | html.HrefTargetBlank
opts := html.RendererOptions{
    Flags: htmlFlags,
    Title: "My Document",
    CSS: "style.css",
}
renderer := html.NewRenderer(opts)

// Convert
html := markdown.ToHTML(md, p, renderer)
```

### Available HTML Flags

| Flag | Description |
|------|-------------|
| `html.CommonFlags` | Common sensible defaults |
| `html.HrefTargetBlank` | Add `target="_blank"` to links |
| `html.CompletePage` | Generate complete HTML document |
| `html.UseXHTML` | Use XHTML output |
| `html.FootnoteReturnLinks` | Add return links in footnotes |
| `html.FootnoteNoHRTag` | No `<hr>` before footnotes |
| `html.Smartypants` | Smart punctuation |
| `html.SmartypantsFractions` | Smart fractions (1/2 → ½) |
| `html.SmartypantsDashes` | Smart dashes (-- → –) |
| `html.SmartypantsLatexDashes` | LaTeX-style dashes |

### Renderer Options

```go
opts := html.RendererOptions{
    Flags:          htmlFlags,
    Title:          "Document Title",
    CSS:            "path/to/style.css",
    Icon:           "favicon.ico",
    Head:           []byte("<meta name='author' content='...'>"),
    RenderNodeHook: customRenderHook,
}
```

## Complete Example

```go
package main

import (
    "os"
    "github.com/gomarkdown/markdown"
    "github.com/gomarkdown/markdown/html"
    "github.com/gomarkdown/markdown/parser"
)

func mdToHTML(md []byte) []byte {
    // Parser with extensions
    extensions := parser.CommonExtensions |
                  parser.AutoHeadingIDs |
                  parser.NoEmptyLineBeforeBlock
    p := parser.NewWithExtensions(extensions)
    doc := p.Parse(md)

    // HTML renderer with options
    htmlFlags := html.CommonFlags | html.HrefTargetBlank
    opts := html.RendererOptions{Flags: htmlFlags}
    renderer := html.NewRenderer(opts)

    return markdown.Render(doc, renderer)
}

func main() {
    md, _ := os.ReadFile("input.md")
    html := mdToHTML(md)
    os.WriteFile("output.html", html, 0644)
}
```

## Security: Sanitizing Output

**Important:** gomarkdown does not sanitize HTML output. Use Bluemonday for untrusted input:

```go
import (
    "github.com/microcosm-cc/bluemonday"
    "github.com/gomarkdown/markdown"
)

// Convert markdown to potentially unsafe HTML
unsafeHTML := markdown.ToHTML(md, nil, nil)

// Sanitize using Bluemonday
p := bluemonday.UGCPolicy()
safeHTML := p.SanitizeBytes(unsafeHTML)
```

### Bluemonday Policies

| Policy | Description |
|--------|-------------|
| `UGCPolicy()` | User-generated content (most common) |
| `StrictPolicy()` | Strip all HTML |
| `StripTagsPolicy()` | Strip tags, keep text |
| `NewPolicy()` | Build custom policy |

## Working with AST

### Accessing the AST

```go
import (
    "github.com/gomarkdown/markdown/ast"
    "github.com/gomarkdown/markdown/parser"
)

p := parser.NewWithExtensions(parser.CommonExtensions)
doc := p.Parse(md)

// Walk the AST
ast.WalkFunc(doc, func(node ast.Node, entering bool) ast.WalkStatus {
    if heading, ok := node.(*ast.Heading); ok && entering {
        fmt.Printf("Found heading level %d\n", heading.Level)
    }
    return ast.GoToNext
})
```

### Custom Renderer

```go
type MyRenderer struct {
    *html.Renderer
}

func (r *MyRenderer) RenderNode(w io.Writer, node ast.Node, entering bool) ast.WalkStatus {
    // Custom rendering logic
    if heading, ok := node.(*ast.Heading); ok && entering {
        fmt.Fprintf(w, "<h%d class='custom'>", heading.Level)
        return ast.GoToNext
    }
    return r.Renderer.RenderNode(w, node, entering)
}
```

## Handling Newlines

Windows and Mac newlines need normalization:

```go
// Normalize newlines before parsing
normalized := parser.NormalizeNewlines(input)
html := markdown.ToHTML(normalized, nil, nil)
```

## Resources

- [Package Documentation](https://pkg.go.dev/github.com/gomarkdown/markdown)
- [Advanced Processing Guide](https://blog.kowalczyk.info/article/cxn3/advanced-markdown-processing-in-go.html)
- [GitHub Repository](https://github.com/gomarkdown/markdown)
- [CLI Tool](https://github.com/gomarkdown/mdtohtml)
- [Bluemonday Sanitizer](https://github.com/microcosm-cc/bluemonday)
hugo.md 6.7 KB
# Hugo Reference

Hugo is the world's fastest static site generator. It builds sites in milliseconds and supports advanced content management features.

## Installation

### Windows

```powershell
# Using Chocolatey
choco install hugo-extended

# Using Scoop
scoop install hugo-extended

# Using Winget
winget install Hugo.Hugo.Extended
```

### macOS

```bash
# Using Homebrew
brew install hugo
```

### Linux

```bash
# Debian/Ubuntu (snap)
snap install hugo --channel=extended

# Using package manager (may not be latest)
sudo apt-get install hugo

# Or download from https://gohugo.io/installation/
```

## Quick Start

### Create New Site

```bash
# Create site
hugo new site mysite
cd mysite

# Initialize git and add theme
git init
git submodule add https://github.com/theNewDynamic/gohugo-theme-ananke themes/ananke
echo "theme = 'ananke'" >> hugo.toml

# Create first post
hugo new content posts/my-first-post.md

# Start development server
hugo server -D
```

### Directory Structure

```
mysite/
├── archetypes/      # Content templates
│   └── default.md
├── assets/          # Assets to process (SCSS, JS)
├── content/         # Markdown content
│   └── posts/
├── data/            # Data files (YAML, JSON, TOML)
├── i18n/            # Internationalization
├── layouts/         # Templates
│   ├── _default/
│   ├── partials/
│   └── shortcodes/
├── static/          # Static files (copied as-is)
├── themes/          # Themes
└── hugo.toml        # Configuration
```

## CLI Commands

| Command | Description |
|---------|-------------|
| `hugo new site <name>` | Create new site |
| `hugo new content <path>` | Create content file |
| `hugo` | Build to `public/` |
| `hugo server` | Start dev server |
| `hugo mod init` | Initialize Hugo Modules |
| `hugo mod tidy` | Clean up modules |

### Build Options

```bash
# Basic build
hugo

# Build with minification
hugo --minify

# Build with drafts
hugo -D

# Build for specific environment
hugo --environment production

# Build to custom directory
hugo -d ./dist

# Verbose output
hugo -v
```

### Server Options

```bash
# Start with drafts
hugo server -D

# Bind to all interfaces
hugo server --bind 0.0.0.0

# Custom port
hugo server --port 8080

# Disable live reload
hugo server --disableLiveReload

# Navigate to changed content
hugo server --navigateToChanged
```

## Configuration (hugo.toml)

```toml
# Basic settings
baseURL = 'https://example.com/'
languageCode = 'en-us'
title = 'My Hugo Site'
theme = 'ananke'

# Build settings
[build]
  writeStats = true

# Markdown configuration
[markup]
  [markup.goldmark]
    [markup.goldmark.extensions]
      definitionList = true
      footnote = true
      linkify = true
      strikethrough = true
      table = true
      taskList = true
    [markup.goldmark.parser]
      autoHeadingID = true
      autoHeadingIDType = 'github'
    [markup.goldmark.renderer]
      unsafe = false
  [markup.highlight]
    style = 'monokai'
    lineNos = true

# Taxonomies
[taxonomies]
  category = 'categories'
  tag = 'tags'
  author = 'authors'

# Menus
[menus]
  [[menus.main]]
    name = 'Home'
    pageRef = '/'
    weight = 10
  [[menus.main]]
    name = 'Posts'
    pageRef = '/posts'
    weight = 20

# Parameters
[params]
  description = 'My awesome site'
  author = 'John Doe'
```

## Front Matter

Hugo supports TOML, YAML, and JSON front matter:

### TOML (default)

```markdown
+++
title = 'My First Post'
date = 2025-01-28T12:00:00-05:00
draft = false
tags = ['hugo', 'tutorial']
categories = ['blog']
author = 'John Doe'
+++

Content here...
```

### YAML

```markdown
---
title: "My First Post"
date: 2025-01-28T12:00:00-05:00
draft: false
tags: ["hugo", "tutorial"]
---

Content here...
```

## Templates

### Base Template (_default/baseof.html)

```html
<!DOCTYPE html>
<html>
<head>
  <title>{{ .Title }} | {{ .Site.Title }}</title>
  {{ partial "head.html" . }}
</head>
<body>
  {{ partial "header.html" . }}
  <main>
    {{ block "main" . }}{{ end }}
  </main>
  {{ partial "footer.html" . }}
</body>
</html>
```

### Single Page (_default/single.html)

```html
{{ define "main" }}
<article>
  <h1>{{ .Title }}</h1>
  <time>{{ .Date.Format "January 2, 2006" }}</time>
  {{ .Content }}
</article>
{{ end }}
```

### List Page (_default/list.html)

```html
{{ define "main" }}
<h1>{{ .Title }}</h1>
{{ range .Pages }}
  <article>
    <h2><a href="{{ .Permalink }}">{{ .Title }}</a></h2>
    <p>{{ .Summary }}</p>
  </article>
{{ end }}
{{ end }}
```

## Shortcodes

### Built-in Shortcodes

```markdown
{{< figure src="/images/photo.jpg" title="My Photo" >}}

{{< youtube dQw4w9WgXcQ >}}

{{< gist user 12345 >}}

{{< highlight go >}}
fmt.Println("Hello")
{{< /highlight >}}
```

### Custom Shortcode (layouts/shortcodes/alert.html)

```html
<div class="alert alert-{{ .Get "type" | default "info" }}">
  {{ .Inner | markdownify }}
</div>
```

Usage:

```markdown
{{< alert type="warning" >}}
**Warning:** This is important!
{{< /alert >}}
```

## Content Organization

### Page Bundles

```
content/
├── posts/
│   └── my-post/           # Page bundle
│       ├── index.md       # Content
│       └── image.jpg      # Resources
└── _index.md              # Section page
```

### Accessing Resources

```html
{{ $image := .Resources.GetMatch "image.jpg" }}
{{ with $image }}
  <img src="{{ .RelPermalink }}" alt="...">
{{ end }}
```

## Hugo Pipes (Asset Processing)

### SCSS Compilation

```html
{{ $styles := resources.Get "scss/main.scss" | toCSS | minify }}
<link rel="stylesheet" href="{{ $styles.RelPermalink }}">
```

### JavaScript Bundling

```html
{{ $js := resources.Get "js/main.js" | js.Build | minify }}
<script src="{{ $js.RelPermalink }}"></script>
```

## Taxonomies

### Configure

```toml
[taxonomies]
  tag = 'tags'
  category = 'categories'
```

### Use in Front Matter

```markdown
+++
tags = ['go', 'hugo']
categories = ['tutorials']
+++
```

### List Taxonomy Terms

```html
{{ range .Site.Taxonomies.tags }}
  <a href="{{ .Page.Permalink }}">{{ .Page.Title }} ({{ .Count }})</a>
{{ end }}
```

## Multilingual Sites

```toml
defaultContentLanguage = 'en'

[languages]
  [languages.en]
    title = 'My Site'
    weight = 1
  [languages.es]
    title = 'Mi Sitio'
    weight = 2
```

## Troubleshooting

| Issue | Solution |
|-------|----------|
| Page not found | Check `baseURL` configuration |
| Theme not loading | Verify theme path in config |
| Raw HTML not showing | Set `unsafe = true` in goldmark config |
| Slow builds | Use `--templateMetrics` to debug |
| Module errors | Run `hugo mod tidy` |
| CSS not updating | Clear browser cache or use fingerprinting |

## Resources

- [Hugo Documentation](https://gohugo.io/documentation/)
- [Hugo Themes](https://themes.gohugo.io/)
- [Hugo Discourse](https://discourse.gohugo.io/)
- [GitHub Repository](https://github.com/gohugoio/hugo)
- [Quick Reference](https://gohugo.io/quick-reference/)
jekyll.md 5.6 KB
# Jekyll Reference

Jekyll is a static site generator that transforms Markdown content into complete websites. It's blog-aware and powers GitHub Pages.

## Installation

### Prerequisites

- Ruby 2.7.0 or higher
- RubyGems
- GCC and Make

### Install Jekyll

```bash
# Install Jekyll and Bundler
gem install jekyll bundler
```

### Platform-Specific Installation

```bash
# macOS (install Xcode CLI tools first)
xcode-select --install
gem install jekyll bundler

# Ubuntu/Debian
sudo apt-get install ruby-full build-essential zlib1g-dev
gem install jekyll bundler

# Windows (use RubyInstaller)
# Download from https://rubyinstaller.org/
gem install jekyll bundler
```

## Quick Start

### Create New Site

```bash
# Create new Jekyll site
jekyll new myblog

# Navigate to site
cd myblog

# Build and serve
bundle exec jekyll serve

# Open http://localhost:4000
```

### Directory Structure

```
myblog/
├── _config.yml      # Site configuration
├── _posts/          # Blog posts
│   └── 2025-01-28-welcome.md
├── _layouts/        # Page templates
├── _includes/       # Reusable components
├── _data/           # Data files (YAML, JSON, CSV)
├── _sass/           # Sass partials
├── assets/          # CSS, JS, images
├── index.md         # Home page
└── Gemfile          # Ruby dependencies
```

## CLI Commands

| Command | Description |
|---------|-------------|
| `jekyll new <name>` | Create new site |
| `jekyll build` | Build to `_site/` |
| `jekyll serve` | Build and serve locally |
| `jekyll clean` | Remove generated files |
| `jekyll doctor` | Check for issues |

### Build Options

```bash
# Build site
bundle exec jekyll build

# Build with production environment
JEKYLL_ENV=production bundle exec jekyll build

# Build to custom directory
bundle exec jekyll build --destination ./public

# Build with incremental regeneration
bundle exec jekyll build --incremental
```

### Serve Options

```bash
# Serve with live reload
bundle exec jekyll serve --livereload

# Include draft posts
bundle exec jekyll serve --drafts

# Specify port
bundle exec jekyll serve --port 8080

# Bind to all interfaces
bundle exec jekyll serve --host 0.0.0.0
```

## Configuration (_config.yml)

```yaml
# Site settings
title: My Blog
description: A great blog
baseurl: ""
url: "https://example.com"

# Build settings
markdown: kramdown
theme: minima
plugins:
  - jekyll-feed
  - jekyll-seo-tag

# Kramdown settings
kramdown:
  input: GFM
  syntax_highlighter: rouge
  hard_wrap: false

# Collections
collections:
  docs:
    output: true
    permalink: /docs/:name/

# Defaults
defaults:
  - scope:
      path: ""
      type: "posts"
    values:
      layout: "post"

# Exclude from processing
exclude:
  - Gemfile
  - Gemfile.lock
  - node_modules
  - vendor
```

## Front Matter

Every content file needs YAML front matter:

```markdown
---
layout: post
title: "My First Post"
date: 2025-01-28 12:00:00 -0500
categories: blog tutorial
tags: [jekyll, markdown]
author: John Doe
excerpt: "A brief introduction..."
published: true
---

Your content here...
```

## Markdown Processors

### Kramdown (Default)

```yaml
# _config.yml
markdown: kramdown
kramdown:
  input: GFM                    # GitHub Flavored Markdown
  syntax_highlighter: rouge
  syntax_highlighter_opts:
    block:
      line_numbers: true
```

### CommonMark

```ruby
# Gemfile
gem 'jekyll-commonmark-ghpages'
```

```yaml
# _config.yml
markdown: CommonMarkGhPages
commonmark:
  options: ["SMART", "FOOTNOTES"]
  extensions: ["strikethrough", "autolink", "table"]
```

## Liquid Templating

### Variables

```liquid
{{ page.title }}
{{ site.title }}
{{ content }}
{{ page.date | date: "%B %d, %Y" }}
```

### Loops

```liquid
{% for post in site.posts %}
  <article>
    <h2><a href="{{ post.url }}">{{ post.title }}</a></h2>
    <p>{{ post.excerpt }}</p>
  </article>
{% endfor %}
```

### Conditionals

```liquid
{% if page.title %}
  <h1>{{ page.title }}</h1>
{% endif %}

{% unless page.draft %}
  {{ content }}
{% endunless %}
```

### Includes

```liquid
{% include header.html %}
{% include footer.html param="value" %}
```

## Layouts

### Basic Layout (_layouts/default.html)

```html
<!DOCTYPE html>
<html>
<head>
  <title>{{ page.title }} | {{ site.title }}</title>
  <link rel="stylesheet" href="{{ '/assets/css/style.css' | relative_url }}">
</head>
<body>
  {% include header.html %}
  <main>
    {{ content }}
  </main>
  {% include footer.html %}
</body>
</html>
```

### Post Layout (_layouts/post.html)

```html
---
layout: default
---
<article>
  <h1>{{ page.title }}</h1>
  <time>{{ page.date | date: "%B %d, %Y" }}</time>
  {{ content }}
</article>
```

## Plugins

### Common Plugins

```ruby
# Gemfile
group :jekyll_plugins do
  gem 'jekyll-feed'        # RSS feed
  gem 'jekyll-seo-tag'     # SEO meta tags
  gem 'jekyll-sitemap'     # XML sitemap
  gem 'jekyll-paginate'    # Pagination
  gem 'jekyll-archives'    # Archive pages
end
```

### Using Plugins

```yaml
# _config.yml
plugins:
  - jekyll-feed
  - jekyll-seo-tag
  - jekyll-sitemap
```

## Troubleshooting

| Issue | Solution |
|-------|----------|
| Ruby 3.0+ webrick error | `bundle add webrick` |
| Permission denied | Use `--user-install` or rbenv |
| Slow builds | Use `--incremental` |
| Liquid errors | Check for unescaped `{` `}` |
| Encoding issues | Add `encoding: utf-8` to config |
| Plugin not loading | Add to both Gemfile and _config.yml |

## Resources

- [Jekyll Documentation](https://jekyllrb.com/docs/)
- [Liquid Template Language](https://shopify.github.io/liquid/)
- [Kramdown Documentation](https://kramdown.gettalong.org/)
- [GitHub Repository](https://github.com/jekyll/jekyll)
- [Jekyll Themes](https://jekyllthemes.io/)
marked.md 2.9 KB
# Marked

## Quick Conversion Methods

Expanded portions of `SKILL.md` at `### Quick Conversion Methods`.

### Method 1: CLI (Recommended for Single Files)

```bash
# Convert file to HTML
marked -i input.md -o output.html

# Convert string directly
marked -s "# Hello World"

# Output: <h1>Hello World</h1>
```

### Method 2: Node.js Script

```javascript
import { marked } from 'marked';
import { readFileSync, writeFileSync } from 'fs';

const markdown = readFileSync('input.md', 'utf-8');
const html = marked.parse(markdown);
writeFileSync('output.html', html);
```

### Method 3: Browser Usage

```html
<script src="https://cdn.jsdelivr.net/npm/marked/lib/marked.umd.js"></script>
<script>
  const html = marked.parse('# Markdown Content');
  document.getElementById('output').innerHTML = html;
</script>
```

---

## Step-by-Step Workflows

Expanded portions of `SKILL.md` at `### Step-by-Step Workflows`.

### Workflow 1: Single File Conversion

1. Ensure marked is installed: `npm install -g marked`
2. Run conversion: `marked -i README.md -o README.html`
3. Verify output file was created

### Workflow 2: Batch Conversion (Multiple Files)

Create a script `convert-all.js`:

```javascript
import { marked } from 'marked';
import { readFileSync, writeFileSync, readdirSync } from 'fs';
import { join, basename } from 'path';

const inputDir = './docs';
const outputDir = './html';

readdirSync(inputDir)
  .filter(file => file.endsWith('.md'))
  .forEach(file => {
    const markdown = readFileSync(join(inputDir, file), 'utf-8');
    const html = marked.parse(markdown);
    const outputFile = basename(file, '.md') + '.html';
    writeFileSync(join(outputDir, outputFile), html);
    console.log(`Converted: ${file} → ${outputFile}`);
  });
```

Run with: `node convert-all.js`

### Workflow 3: Conversion with Custom Options

```javascript
import { marked } from 'marked';

// Configure options
marked.setOptions({
  gfm: true,           // GitHub Flavored Markdown
  breaks: true,        // Convert \n to <br>
  pedantic: false,     // Don't conform to original markdown.pl
});

const html = marked.parse(markdownContent);
```

### Workflow 4: Complete HTML Document

Wrap converted content in a full HTML template:

```javascript
import { marked } from 'marked';
import { readFileSync, writeFileSync } from 'fs';

const markdown = readFileSync('input.md', 'utf-8');
const content = marked.parse(markdown);

const html = `<!DOCTYPE html>
<html lang="en">
<head>
  <meta charset="UTF-8">
  <meta name="viewport" content="width=device-width, initial-scale=1.0">
  <title>Document</title>
  <style>
    body { font-family: -apple-system, BlinkMacSystemFont, 'Segoe UI', sans-serif; max-width: 800px; margin: 0 auto; padding: 2rem; }
    pre { background: #f4f4f4; padding: 1rem; overflow-x: auto; }
    code { background: #f4f4f4; padding: 0.2rem 0.4rem; border-radius: 3px; }
  </style>
</head>
<body>
${content}
</body>
</html>`;

writeFileSync('output.html', html);
```
pandoc.md 4.0 KB
# Pandoc Reference

Pandoc is a universal document converter that can convert between numerous markup formats, including Markdown, HTML, LaTeX, Word, and many more.

## Installation

### Windows

```powershell
# Using Chocolatey
choco install pandoc

# Using Scoop
scoop install pandoc

# Or download installer from https://pandoc.org/installing.html
```

### macOS

```bash
# Using Homebrew
brew install pandoc
```

### Linux

```bash
# Debian/Ubuntu
sudo apt-get install pandoc

# Fedora
sudo dnf install pandoc

# Or download from https://pandoc.org/installing.html
```

## Basic Usage

### Convert Markdown to HTML

```bash
# Basic conversion
pandoc input.md -o output.html

# Standalone document with headers
pandoc input.md -s -o output.html

# With custom CSS
pandoc input.md -s --css=style.css -o output.html
```

### Convert to Other Formats

```bash
# To PDF (requires LaTeX)
pandoc input.md -s -o output.pdf

# To Word
pandoc input.md -s -o output.docx

# To LaTeX
pandoc input.md -s -o output.tex

# To EPUB
pandoc input.md -s -o output.epub
```

### Convert from Other Formats

```bash
# HTML to Markdown
pandoc -f html -t markdown input.html -o output.md

# Word to Markdown
pandoc input.docx -o output.md

# LaTeX to HTML
pandoc -f latex -t html input.tex -o output.html
```

## Common Options

| Option | Description |
|--------|-------------|
| `-f, --from <format>` | Input format |
| `-t, --to <format>` | Output format |
| `-s, --standalone` | Produce standalone document |
| `-o, --output <file>` | Output file |
| `--toc` | Include table of contents |
| `--toc-depth <n>` | TOC depth (default: 3) |
| `-N, --number-sections` | Number section headings |
| `--css <url>` | Link to CSS stylesheet |
| `--template <file>` | Use custom template |
| `--metadata <key>=<value>` | Set metadata |
| `--mathml` | Use MathML for math |
| `--mathjax` | Use MathJax for math |
| `-V, --variable <key>=<value>` | Set template variable |

## Markdown Extensions

Pandoc supports many markdown extensions:

```bash
# Enable specific extensions
pandoc -f markdown+emoji+footnotes input.md -o output.html

# Disable specific extensions
pandoc -f markdown-pipe_tables input.md -o output.html

# Use strict markdown
pandoc -f markdown_strict input.md -o output.html
```

### Common Extensions

| Extension | Description |
|-----------|-------------|
| `pipe_tables` | Pipe tables (default on) |
| `footnotes` | Footnote support |
| `emoji` | Emoji shortcodes |
| `smart` | Smart quotes and dashes |
| `task_lists` | Task list checkboxes |
| `strikeout` | Strikethrough text |
| `superscript` | Superscript text |
| `subscript` | Subscript text |
| `raw_html` | Raw HTML passthrough |

## Templates

### Using Built-in Templates

```bash
# View default template
pandoc -D html

# Use custom template
pandoc --template=mytemplate.html input.md -o output.html
```

### Template Variables

```html
<!DOCTYPE html>
<html>
<head>
  <title>$title$</title>
  $for(css)$
  <link rel="stylesheet" href="$css$">
  $endfor$
</head>
<body>
$body$
</body>
</html>
```

## YAML Metadata

Include metadata in your markdown files:

```markdown
---
title: My Document
author: John Doe
date: 2025-01-28
abstract: |
  This is the abstract.
---

# Introduction

Document content here...
```

## Filters

### Using Lua Filters

```bash
pandoc --lua-filter=filter.lua input.md -o output.html
```

Example Lua filter (`filter.lua`):

```lua
function Header(el)
  if el.level == 1 then
    el.classes:insert("main-title")
  end
  return el
end
```

### Using Pandoc Filters

```bash
pandoc --filter pandoc-citeproc input.md -o output.html
```

## Batch Conversion

### Bash Script

```bash
#!/bin/bash
for file in *.md; do
  pandoc "$file" -s -o "${file%.md}.html"
done
```

### PowerShell Script

```powershell
Get-ChildItem -Filter *.md | ForEach-Object {
  $output = $_.BaseName + ".html"
  pandoc $_.Name -s -o $output
}
```

## Resources

- [Pandoc User's Guide](https://pandoc.org/MANUAL.html)
- [Pandoc Demos](https://pandoc.org/demos.html)
- [Pandoc FAQ](https://pandoc.org/faqs.html)
- [GitHub Repository](https://github.com/jgm/pandoc)
tables-to-html.md 2.6 KB
# Tables to HTML

## Creating a table

### Markdown

```markdown

| First Header  | Second Header |
| ------------- | ------------- |
| Content Cell  | Content Cell  |
| Content Cell  | Content Cell  |
```

### Parsed HTML

```html
<table>
 <thead>
  <tr>
   <th>First Header</th>
   <th>Second Header</th>
  </tr>
 </thead>
 <tbody>
  <tr>
   <td>Content Cell</td>
   <td>Content Cell</td>
  </tr>
  <tr>
   <td>Content Cell</td>
   <td>Content Cell</td>
  </tr>
 </tbody>
</table>
```

### Markdown

```markdown
| Command | Description |
| --- | --- |
| git status | List all new or modified files |
| git diff | Show file differences that haven't been staged |
```

### Parsed HTML

```html
<table>
 <thead>
  <tr>
   <th>Command</th>
   <th>Description</th>
  </tr>
 </thead>
 <tbody>
  <tr>
   <td>git status</td>
   <td>List all new or modified files</td>
  </tr>
  <tr>
   <td>git diff</td>
   <td>Show file differences that haven't been staged</td>
  </tr>
 </tbody>
</table>
```

## Formatting Content in Tables

### Markdown

```markdown
| Command | Description |
| --- | --- |
| `git status` | List all *new or modified* files |
| `git diff` | Show file differences that **haven't been** staged |
```

### Parsed HTML

```html
<table>
 <thead>
  <tr>
   <th>Command</th>
   <th>Description</th>
  </tr>
 </thead>
 <tbody>
  <tr>
   <td><code>git status</code></td>
   <td>List all <em>new or modified</em> files</td>
  </tr>
  <tr>
   <td><code>git diff</code></td>
   <td>Show file differences that <strong>haven't been</strong> staged</td>
  </tr>
 </tbody>
</table>
```

### Markdown

```markdown
| Left-aligned | Center-aligned | Right-aligned |
| :---         |     :---:      |          ---: |
| git status   | git status     | git status    |
| git diff     | git diff       | git diff      |
```

### Parsed HTML

```html
<table>
  <thead>
   <tr>
    <th align="left">Left-aligned</th>
    <th align="center">Center-aligned</th>
    <th align="right">Right-aligned</th>
   </tr>
  </thead>
  <tbody>
   <tr>
    <td align="left">git status</td>
    <td align="center">git status</td>
    <td align="right">git status</td>
   </tr>
   <tr>
    <td align="left">git diff</td>
    <td align="center">git diff</td>
    <td align="right">git diff</td>
   </tr>
  </tbody>
</table>
```

### Markdown

```markdown
| Name     | Character |
| ---      | ---       |
| Backtick | `         |
| Pipe     | \|        |
```

### Parsed HTML

```html
<table>
 <thead>
  <tr>
   <th>Name</th>
   <th>Character</th>
  </tr>
 </thead>
 <tbody>
  <tr>
   <td>Backtick</td>
   <td>`</td>
  </tr>
  <tr>
   <td>Pipe</td>
   <td>|</td>
  </tr>
 </tbody>
</table>
```
tables.md 3.7 KB
# Organizing information with tables
You can build tables to organize information in comments, issues, pull requests, and wikis.
## Creating a table
You can create tables with pipes `|` and hyphens `-`. Hyphens are used to create each column's header, while pipes separate each column. You must include a blank line before your table in order for it to correctly render.
```markdown
| First Header | Second Header |
| ------------- | ------------- |
| Content Cell | Content Cell |
| Content Cell | Content Cell |
```
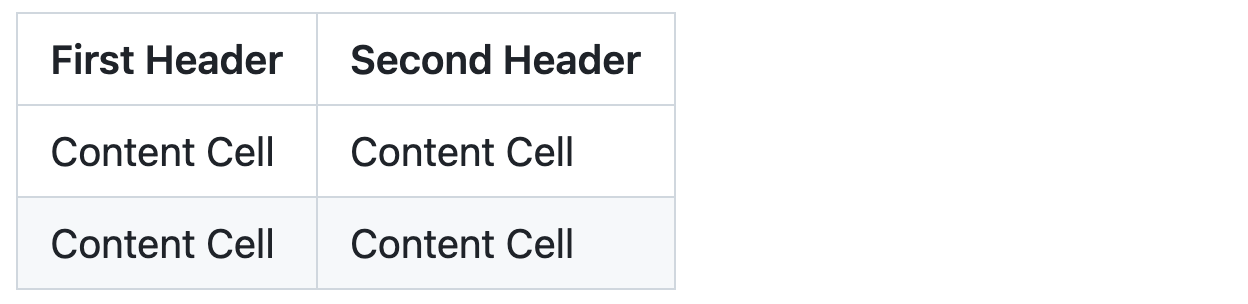
The pipes on either end of the table are optional.
Cells can vary in width and do not need to be perfectly aligned within columns. There must be at least three hyphens in each column of the header row.
```markdown
| Command | Description |
| --- | --- |
| git status | List all new or modified files |
| git diff | Show file differences that haven't been staged |
```
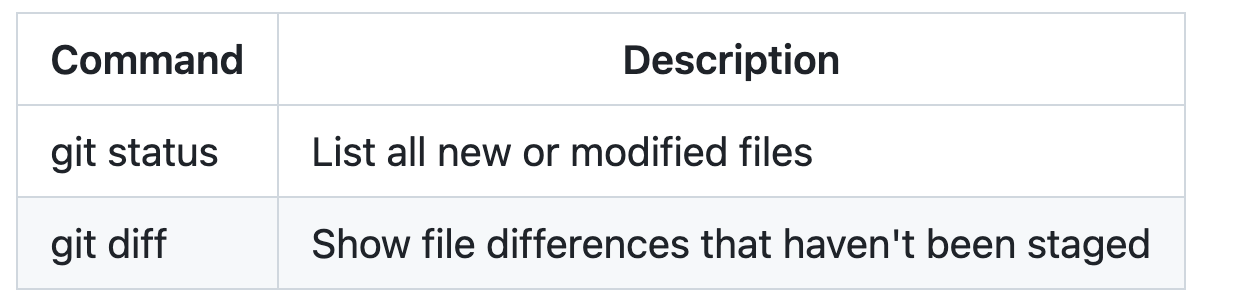
If you are frequently editing code snippets and tables, you may benefit from enabling a fixed-width font in all comment fields on GitHub. For more information, see [About writing and formatting on GitHub](https://docs.github.com/get-started/writing-on-github/getting-started-with-writing-and-formatting-on-github/about-writing-and-formatting-on-github#enabling-fixed-width-fonts-in-the-editor).
## Formatting content within your table
You can use [formatting](https://docs.github.com/get-started/writing-on-github/getting-started-with-writing-and-formatting-on-github/basic-writing-and-formatting-syntax) such as links, inline code blocks, and text styling within your table:
```markdown
| Command | Description |
| --- | --- |
| `git status` | List all *new or modified* files |
| `git diff` | Show file differences that **haven't been** staged |
```

You can align text to the left, right, or center of a column by including colons `:` to the left, right, or on both sides of the hyphens within the header row.
```markdown
| Left-aligned | Center-aligned | Right-aligned |
| :--- | :---: | ---: |
| git status | git status | git status |
| git diff | git diff | git diff |
```
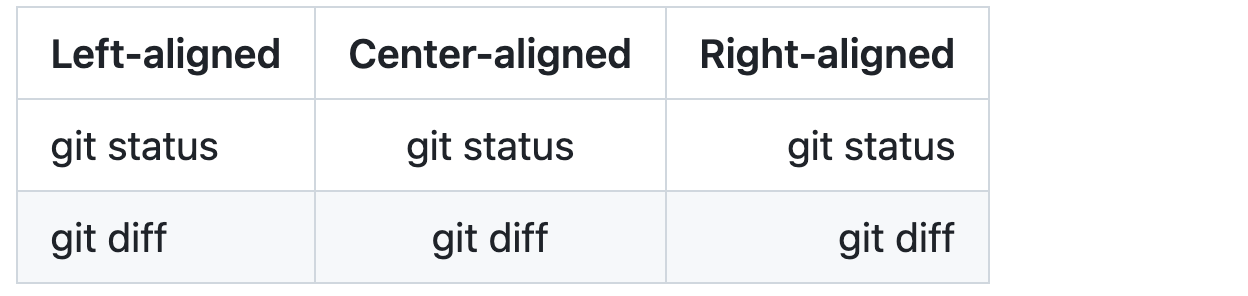
To include a pipe `|` as content within your cell, use a `\` before the pipe:
```markdown
| Name | Character |
| --- | --- |
| Backtick | ` |
| Pipe | \| |
```

## Further reading
* [GitHub Flavored Markdown Spec](https://github.github.com/gfm/)
* [Basic writing and formatting syntax](https://docs.github.com/get-started/writing-on-github/getting-started-with-writing-and-formatting-on-github/basic-writing-and-formatting-syntax)writing-mathematical-expressions-to-html.md 5.8 KB
# Writing Mathematical Expressions to HTML

## Writing Inline Expressions

### Markdown

```markdown
This sentence uses `$` delimiters to show math inline: $\sqrt{3x-1}+(1+x)^2$
```

### Parsed HTML

```html
<p>This sentence uses <code>$</code> delimiters to show math inline:
 <math-renderer><math xmlns="http://www.w3.org/1998/Math/MathML">
  <msqrt>
   <mn>3</mn>
   <mi>x</mi>
   <mo>−</mo>
   <mn>1</mn>
  </msqrt>
  <mo>+</mo>
  <mo>(</mo>
  <mn>1</mn>
  <mo>+</mo>
  <mi>x</mi>
  <msup>
   <mo>)</mo>
   <mn>2</mn>
  </msup>
</math>
</math-renderer>
</p>
```

### Markdown

```markdown
This sentence uses $\` and \`$ delimiters to show math inline: $`\sqrt{3x-1}+(1+x)^2`$
```

### Parsed HTML

```html
<p>This sentence uses
 <math-renderer>
  <math xmlns="http://www.w3.org/1998/Math/MathML">
   <mo>‘</mo>
   <mi>a</mi>
   <mi>n</mi>
   <mi>d</mi>
   <mo>‘</mo>
  </math>
 </math-renderer> delimiters to show math inline:
 <math-renderer>
  <math xmlns="http://www.w3.org/1998/Math/MathML">
   <msqrt>
    <mn>3</mn>
    <mi>x</mi>
    <mo>−</mo>
    <mn>1</mn>
   </msqrt>
   <mo>+</mo>
   <mo stretchy="false">(</mo>
   <mn>1</mn>
   <mo>+</mo>
   <mi>x</mi>
   <msup>
    <mo stretchy="false">)</mo>
    <mn>2</mn>
   </msup>
  </math>
 </math-renderer>
</p>
```

---

## Writing Expressions as Blocks

### Markdown

```markdown
**The Cauchy-Schwarz Inequality**\
$$\left( \sum_{k=1}^n a_k b_k \right)^2 \leq \left( \sum_{k=1}^n a_k^2 \right) \left( \sum_{k=1}^n b_k^2 \right)$$
```

### Parsed HTML

```html
<p>
  <strong>The Cauchy-Schwarz Inequality</strong><br>
  <math-renderer>
    <math xmlns="http://www.w3.org/1998/Math/MathML">
      <msup>
        <mrow>
          <mo>(</mo>
          <munderover>
            <mo>∑</mo>
            <mrow>
              <mi>k</mi>
              <mo>=</mo>
              <mn>1</mn>
            </mrow>
            <mi>n</mi>
          </munderover>
          <msub>
            <mi>a</mi>
            <mi>k</mi>
          </msub>
          <msub>
            <mi>b</mi>
            <mi>k</mi>
          </msub>
          <mo>)</mo>
        </mrow>
        <mn>2</mn>
      </msup>
      <mo>≤</mo>
      <mrow>
        <mo>(</mo>
        <munderover>
          <mo>∑</mo>
          <mrow>
            <mi>k</mi>
            <mo>=</mo>
            <mn>1</mn>
          </mrow>
          <mi>n</mi>
        </munderover>
        <msubsup>
          <mi>a</mi>
          <mi>k</mi>
          <mn>2</mn>
        </msubsup>
        <mo>)</mo>
      </mrow>
      <mrow>
        <mo>(</mo>
        <munderover>
          <mo>∑</mo>
          <mrow>
            <mi>k</mi>
            <mo>=</mo>
            <mn>1</mn>
          </mrow>
          <mi>n</mi>
        </munderover>
        <msubsup>
          <mi>b</mi>
          <mi>k</mi>
          <mn>2</mn>
        </msubsup>
        <mo>)</mo>
      </mrow>
    </math>
  </math-renderer>
</p>
```

### Markdown

```markdown
**The Cauchy-Schwarz Inequality**

    ```math
    \left( \sum_{k=1}^n a_k b_k \right)^2 \leq \left( \sum_{k=1}^n a_k^2 \right) \left( \sum_{k=1}^n b_k^2 \right)
    ```
```

### Parsed HTML

```html
<p><strong>The Cauchy-Schwarz Inequality</strong></p>

<math-renderer>
  <math xmlns="http://www.w3.org/1998/Math/MathML">
    <msup>
      <mrow>
        <mo>(</mo>
        <munderover>
          <mo>∑</mo>
          <mrow>
            <mi>k</mi>
            <mo>=</mo>
            <mn>1</mn>
          </mrow>
          <mi>n</mi>
        </munderover>
        <msub>
          <mi>a</mi>
          <mi>k</mi>
        </msub>
        <msub>
          <mi>b</mi>
          <mi>k</mi>
        </msub>
        <mo>)</mo>
      </mrow>
      <mn>2</mn>
    </msup>
    <mo>≤</mo>
    <mrow>
      <mo>(</mo>
      <munderover>
        <mo>∑</mo>
        <mrow>
          <mi>k</mi>
          <mo>=</mo>
          <mn>1</mn>
        </mrow>
        <mi>n</mi>
      </munderover>
      <msubsup>
        <mi>a</mi>
        <mi>k</mi>
        <mn>2</mn>
      </msubsup>
      <mo>)</mo>
    </mrow>
    <mrow>
      <mo>(</mo>
      <munderover>
        <mo>∑</mo>
        <mrow>
          <mi>k</mi>
          <mo>=</mo>
          <mn>1</mn>
        </mrow>
        <mi>n</mi>
      </munderover>
      <msubsup>
        <mi>b</mi>
        <mi>k</mi>
        <mn>2</mn>
      </msubsup>
      <mo>)</mo>
    </mrow>
  </math>
</math-renderer>
```

### Markdown

```markdown
The equation $a^2 + b^2 = c^2$ is the Pythagorean theorem.
```

### Parsed HTML

```html
<p>The equation
 <math-renderer><math xmlns="http://www.w3.org/1998/Math/MathML">
  <msup>
    <mi>a</mi>
    <mn>2</mn>
  </msup>
  <mo>+</mo>
  <msup>
    <mi>b</mi>
    <mn>2</mn>
  </msup>
  <mo>=</mo>
  <msup>
    <mi>c</mi>
    <mn>2</mn>
  </msup>
 </math></math-renderer> is the Pythagorean theorem.
</p>
```

### Markdown

```
$$
\int_0^\infty e^{-x} dx = 1
$$
```

### Parsed HTML

```html
<p><math-renderer><math xmlns="http://www.w3.org/1998/Math/MathML">
  <msubsup>
    <mo>∫</mo>
    <mn>0</mn>
    <mi>∞</mi>
  </msubsup>
  <msup>
    <mi>e</mi>
    <mrow>
      <mo>−</mo>
      <mi>x</mi>
    </mrow>
  </msup>
  <mi>d</mi>
  <mi>x</mi>
  <mo>=</mo>
  <mn>1</mn>
</math></math-renderer></p>
```

---

## Dollar Sign Inline with Mathematical Expression

### Markdown

```markdown
This expression uses `\$` to display a dollar sign: $`\sqrt{\$4}`$
```

### Parsed HTML

```html
<p>This expression uses
 <code>\$</code> to display a dollar sign:
 <math-renderer>
  <math xmlns="http://www.w3.org/1998/Math/MathML">
   <msqrt>
    <mi>$</mi>
    <mn>4</mn>
   </msqrt>
  </math>
 </math-renderer>
</p>
```

### Markdown

```markdown
To split <span>$</span>100 in half, we calculate $100/2$
```

### Parsed HTML

```html
<p>To split
 <span>$</span>100 in half, we calculate
 <math-renderer>
  <math xmlns="http://www.w3.org/1998/Math/MathML">
   <mn>100</mn>
   <mrow data-mjx-texclass="ORD">
    <mo>/</mo>
   </mrow>
   <mn>2</mn>
  </math>
 </math-renderer>
</p>
```
writing-mathematical-expressions.md 4.8 KB
# Writing mathematical expressions
Use Markdown to display mathematical expressions on GitHub.
## About writing mathematical expressions
To enable clear communication of mathematical expressions, GitHub supports LaTeX formatted math within Markdown. For more information, see [LaTeX/Mathematics](http://en.wikibooks.org/wiki/LaTeX/Mathematics) in Wikibooks.
GitHub's math rendering capability uses MathJax; an open source, JavaScript-based display engine. MathJax supports a wide range of LaTeX macros, and several useful accessibility extensions. For more information, see [the MathJax documentation](http://docs.mathjax.org/en/latest/input/tex/index.html#tex-and-latex-support) and [the MathJax Accessibility Extensions Documentation](https://mathjax.github.io/MathJax-a11y/docs/#reader-guide).
Mathematical expressions rendering is available in GitHub Issues, GitHub Discussions, pull requests, wikis, and Markdown files.
## Writing inline expressions
There are two options for delimiting a math expression inline with your text. You can either surround the expression with dollar symbols (`$`), or start the expression with <code>$\`</code> and end it with <code>\`$</code>. The latter syntax is useful when the expression you are writing contains characters that overlap with markdown syntax. For more information, see [Basic writing and formatting syntax](https://docs.github.com/get-started/writing-on-github/getting-started-with-writing-and-formatting-on-github/basic-writing-and-formatting-syntax).
```text
This sentence uses `$` delimiters to show math inline: $\sqrt{3x-1}+(1+x)^2$
```

```text
This sentence uses $\` and \`$ delimiters to show math inline: $`\sqrt{3x-1}+(1+x)^2`$
```

## Writing expressions as blocks
To add a math expression as a block, start a new line and delimit the expression with two dollar symbols `$$`.
> [!TIP] If you're writing in an .md file, you will need to use specific formatting to create a line break, such as ending the line with a backslash as shown in the example below. For more information on line breaks in Markdown, see [Basic writing and formatting syntax](https://docs.github.com/get-started/writing-on-github/getting-started-with-writing-and-formatting-on-github/basic-writing-and-formatting-syntax#line-breaks).
```text
**The Cauchy-Schwarz Inequality**\
$$\left( \sum_{k=1}^n a_k b_k \right)^2 \leq \left( \sum_{k=1}^n a_k^2 \right) \left( \sum_{k=1}^n b_k^2 \right)$$
```

Alternatively, you can use the <code>\`\`\`math</code> code block syntax to display a math expression as a block. With this syntax, you don't need to use `$$` delimiters. The following will render the same as above:
````text
**The Cauchy-Schwarz Inequality**
```math
\left( \sum_{k=1}^n a_k b_k \right)^2 \leq \left( \sum_{k=1}^n a_k^2 \right) \left( \sum_{k=1}^n b_k^2 \right)
```
````
## Writing dollar signs in line with and within mathematical expressions
To display a dollar sign as a character in the same line as a mathematical expression, you need to escape the non-delimiter `$` to ensure the line renders correctly.
* Within a math expression, add a `\` symbol before the explicit `$`.
```text
This expression uses `\$` to display a dollar sign: $`\sqrt{\$4}`$
```

* Outside a math expression, but on the same line, use span tags around the explicit `$`.
```text
To split <span>$</span>100 in half, we calculate $100/2$
```

## Further reading
* [The MathJax website](http://mathjax.org)
* [Getting started with writing and formatting on GitHub](https://docs.github.com/get-started/writing-on-github/getting-started-with-writing-and-formatting-on-github)
* [GitHub Flavored Markdown Spec](https://github.github.com/gfm/)License (MIT)
View full license text
MIT License

Copyright GitHub, Inc.

Permission is hereby granted, free of charge, to any person obtaining a copy of this software and associated documentation files (the "Software"), to deal in the Software without restriction, including without limitation the rights to use, copy, modify, merge, publish, distribute, sublicense, and/or sell copies of the Software, and to permit persons to whom the Software is furnished to do so, subject to the following conditions:

The above copyright notice and this permission notice shall be included in all copies or substantial portions of the Software.

THE SOFTWARE IS PROVIDED "AS IS", WITHOUT WARRANTY OF ANY KIND, EXPRESS OR IMPLIED, INCLUDING BUT NOT LIMITED TO THE WARRANTIES OF MERCHANTABILITY, FITNESS FOR A PARTICULAR PURPOSE AND NONINFRINGEMENT.